I recently configured a VM with Pi-Hole installed on it, and after running it for a couple of weeks the results are pretty stunning.
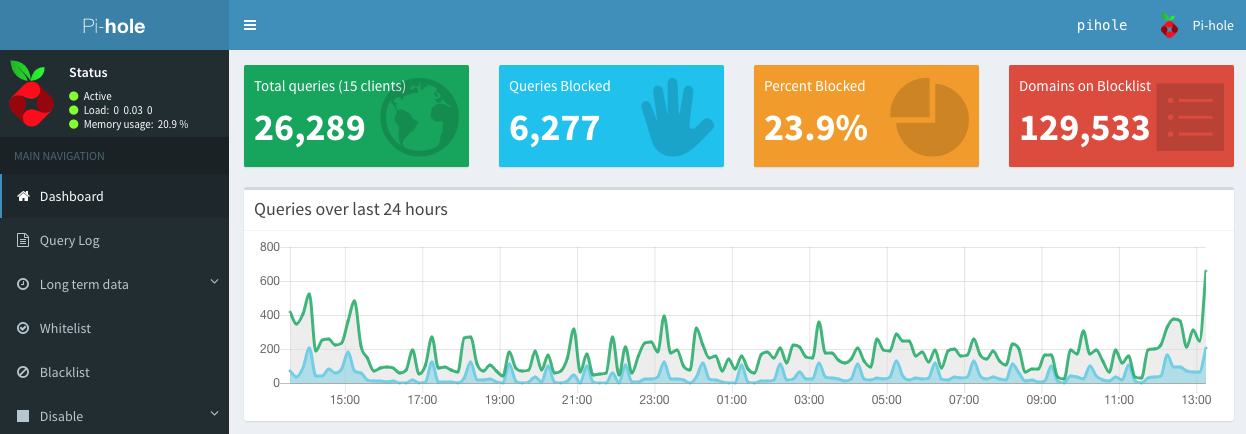
That is a lot of blocked requests, and I have to say that everything just feels faster, even on my 250 Mbps fiber connection.
After playing around with it for a bit, and configuring some of my clients to use it, I decided to go all in. The High Level Architecture I finally settled on looks like this:
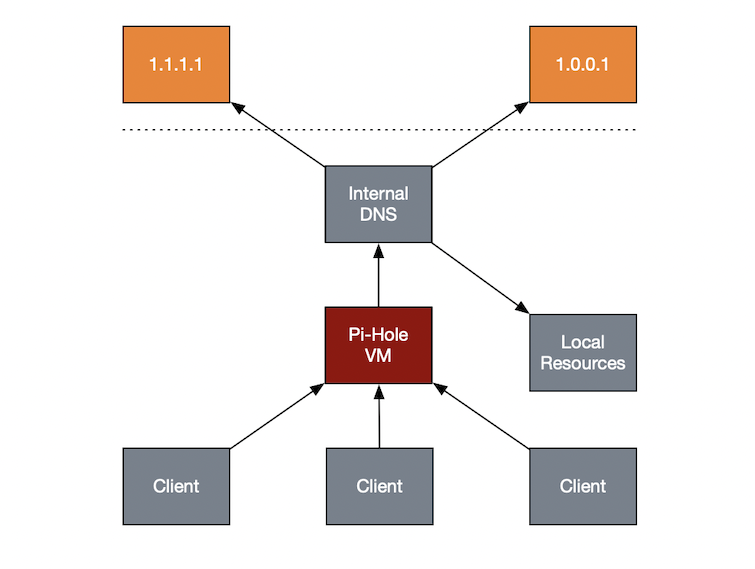
Basically I want all DNS requests in my local network to run through the Pi-Hole, then to my local DNS server before it gets forwarded out on the big bad interwebs.
Currently my Synology NAS also serves as my DHCP and DNS server for my local network. The setup will be similar on whatever DHCP and DNS servers you currently run. In order to get Pi-Hole to filter all my traffic, I configured the DHCP scope to serve the IP address of the Pi-Hole, with the IP of 192.168.5.53 (bonus points for figuring out why it’s .53), instance like this
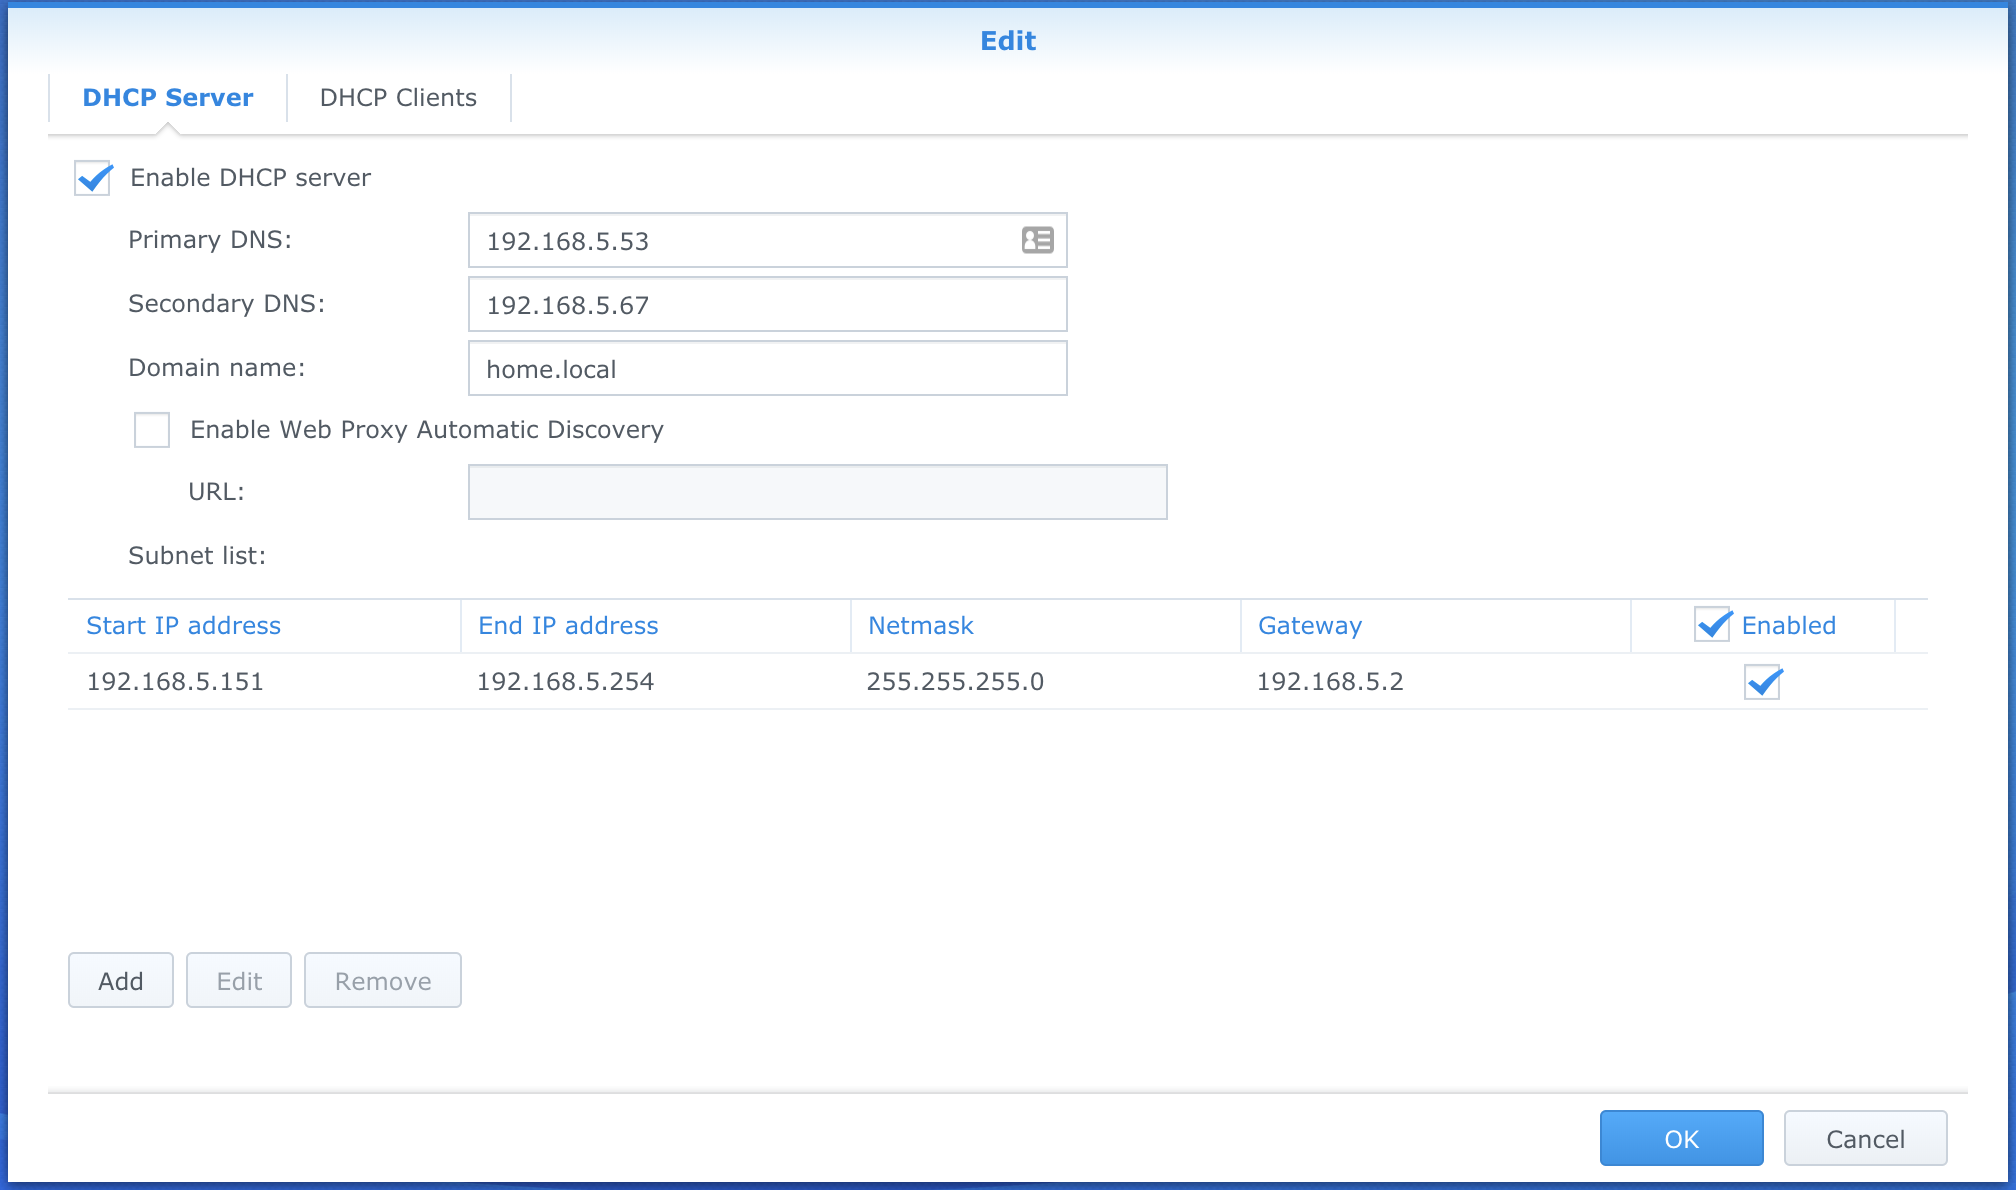
This takes care of any client getting their IP through DHCP, and also sets the Synology (192.168.5.67) itself as the secondary DNS in case the Pi-Hole is not responding for some reason.
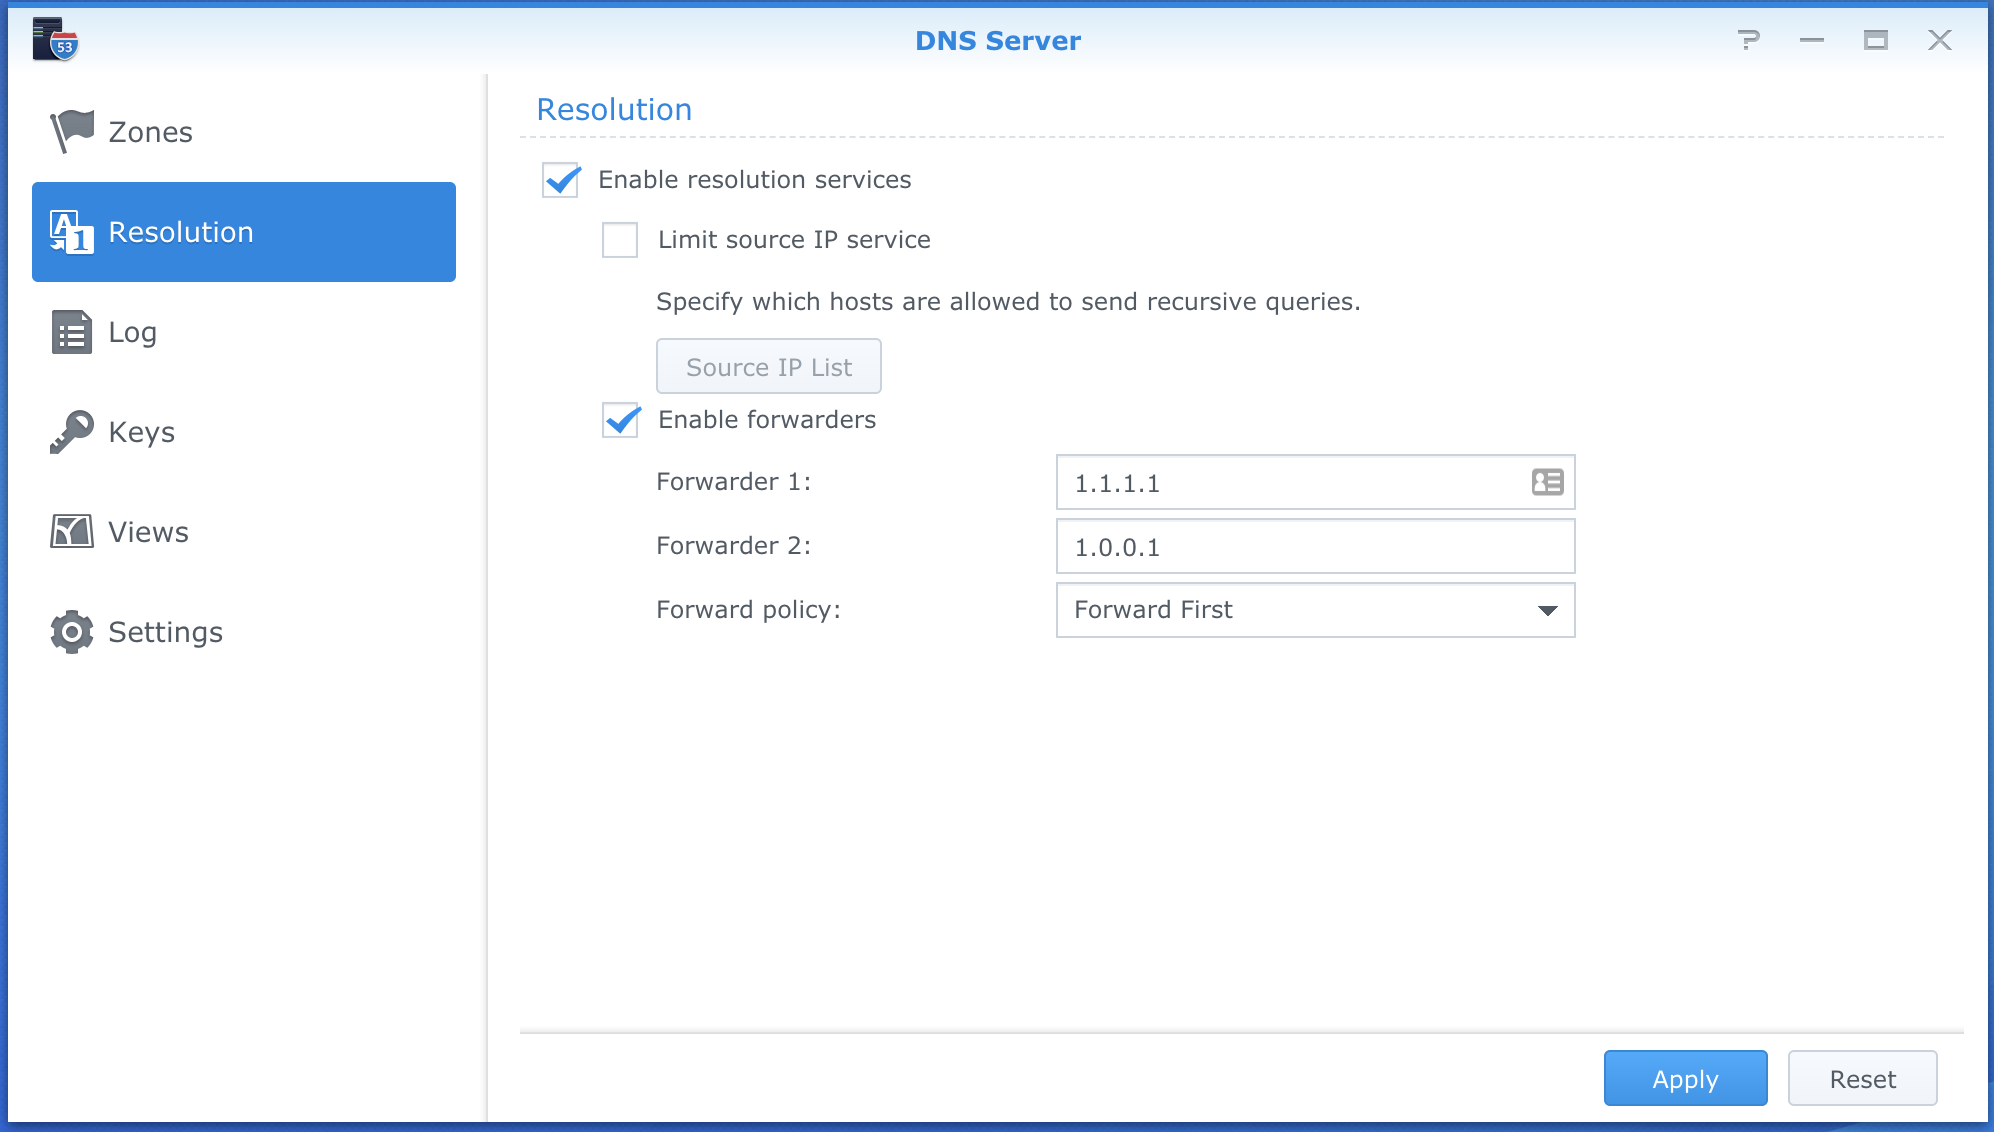
To make sure external name resolution works too, I’ve configured the Synology DNS server to forward to my external DNS servers of choice, 1.1.1.1 and 1.0.0.1 powered by Cloudflare.
Next up was configuring the Pi-Hole itself to forward non-blocked DNS requests to the internal Synology DNS service, and let that handle resolution either local or external. Thankfully this is a pretty easy configuration as well, this time in the Pi-Hole admin interface which is available on http://pi.hole/admin
Go to Settings -> DNS and set your custom DNS upstream DNS servers
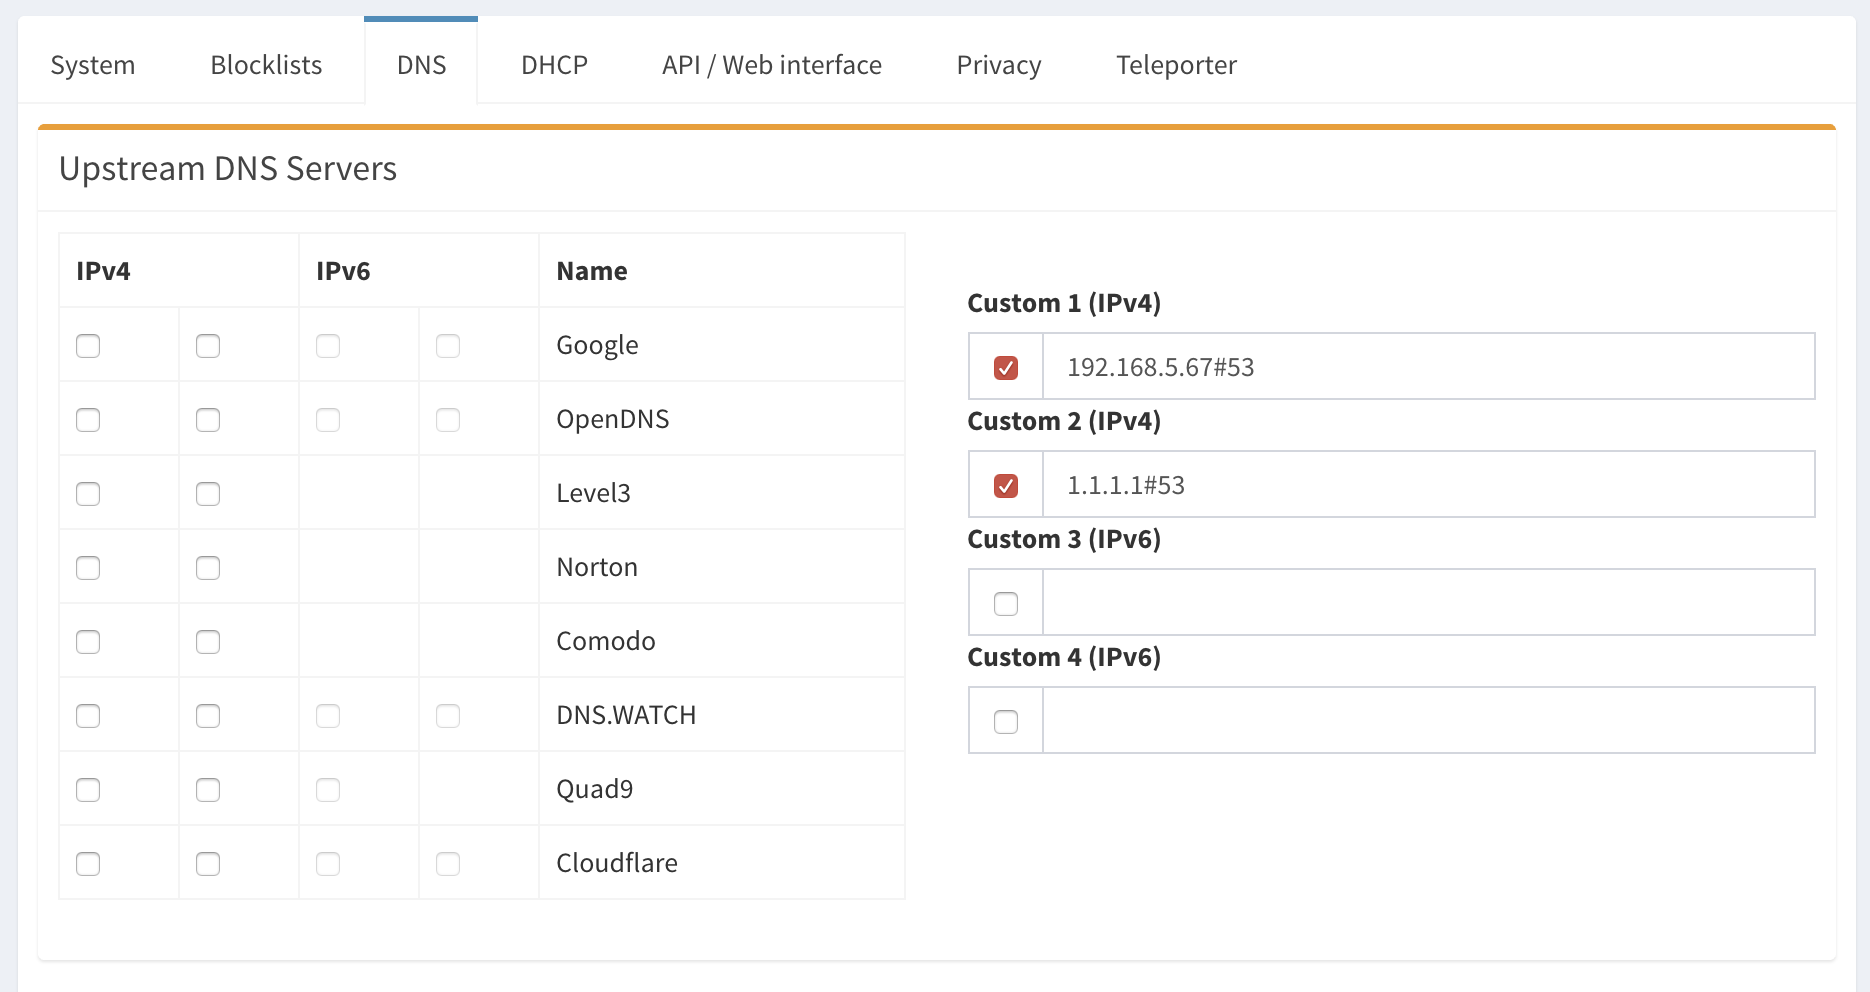
I’ve set mine to first point to my Synology and if that fails, try to go directly to 1.1.1.1. This way I have backup DNS servers both from DHCP, and inside of Pi-Hole itself should either the Pi-Hole VM or the Synology be unavailable (for DHCP I have a backup DHCP scope configured in my router, and activate that should there be a need).
Conditional Forwarding#
In order to get local name resolution to work properly through Pi-Hole, I also had to configure another setting in Pi-Hole itself. On the bottom of the Settings -> DNS page, under Advanced DNS settings you’ll find something called Use Conditional Forwarding
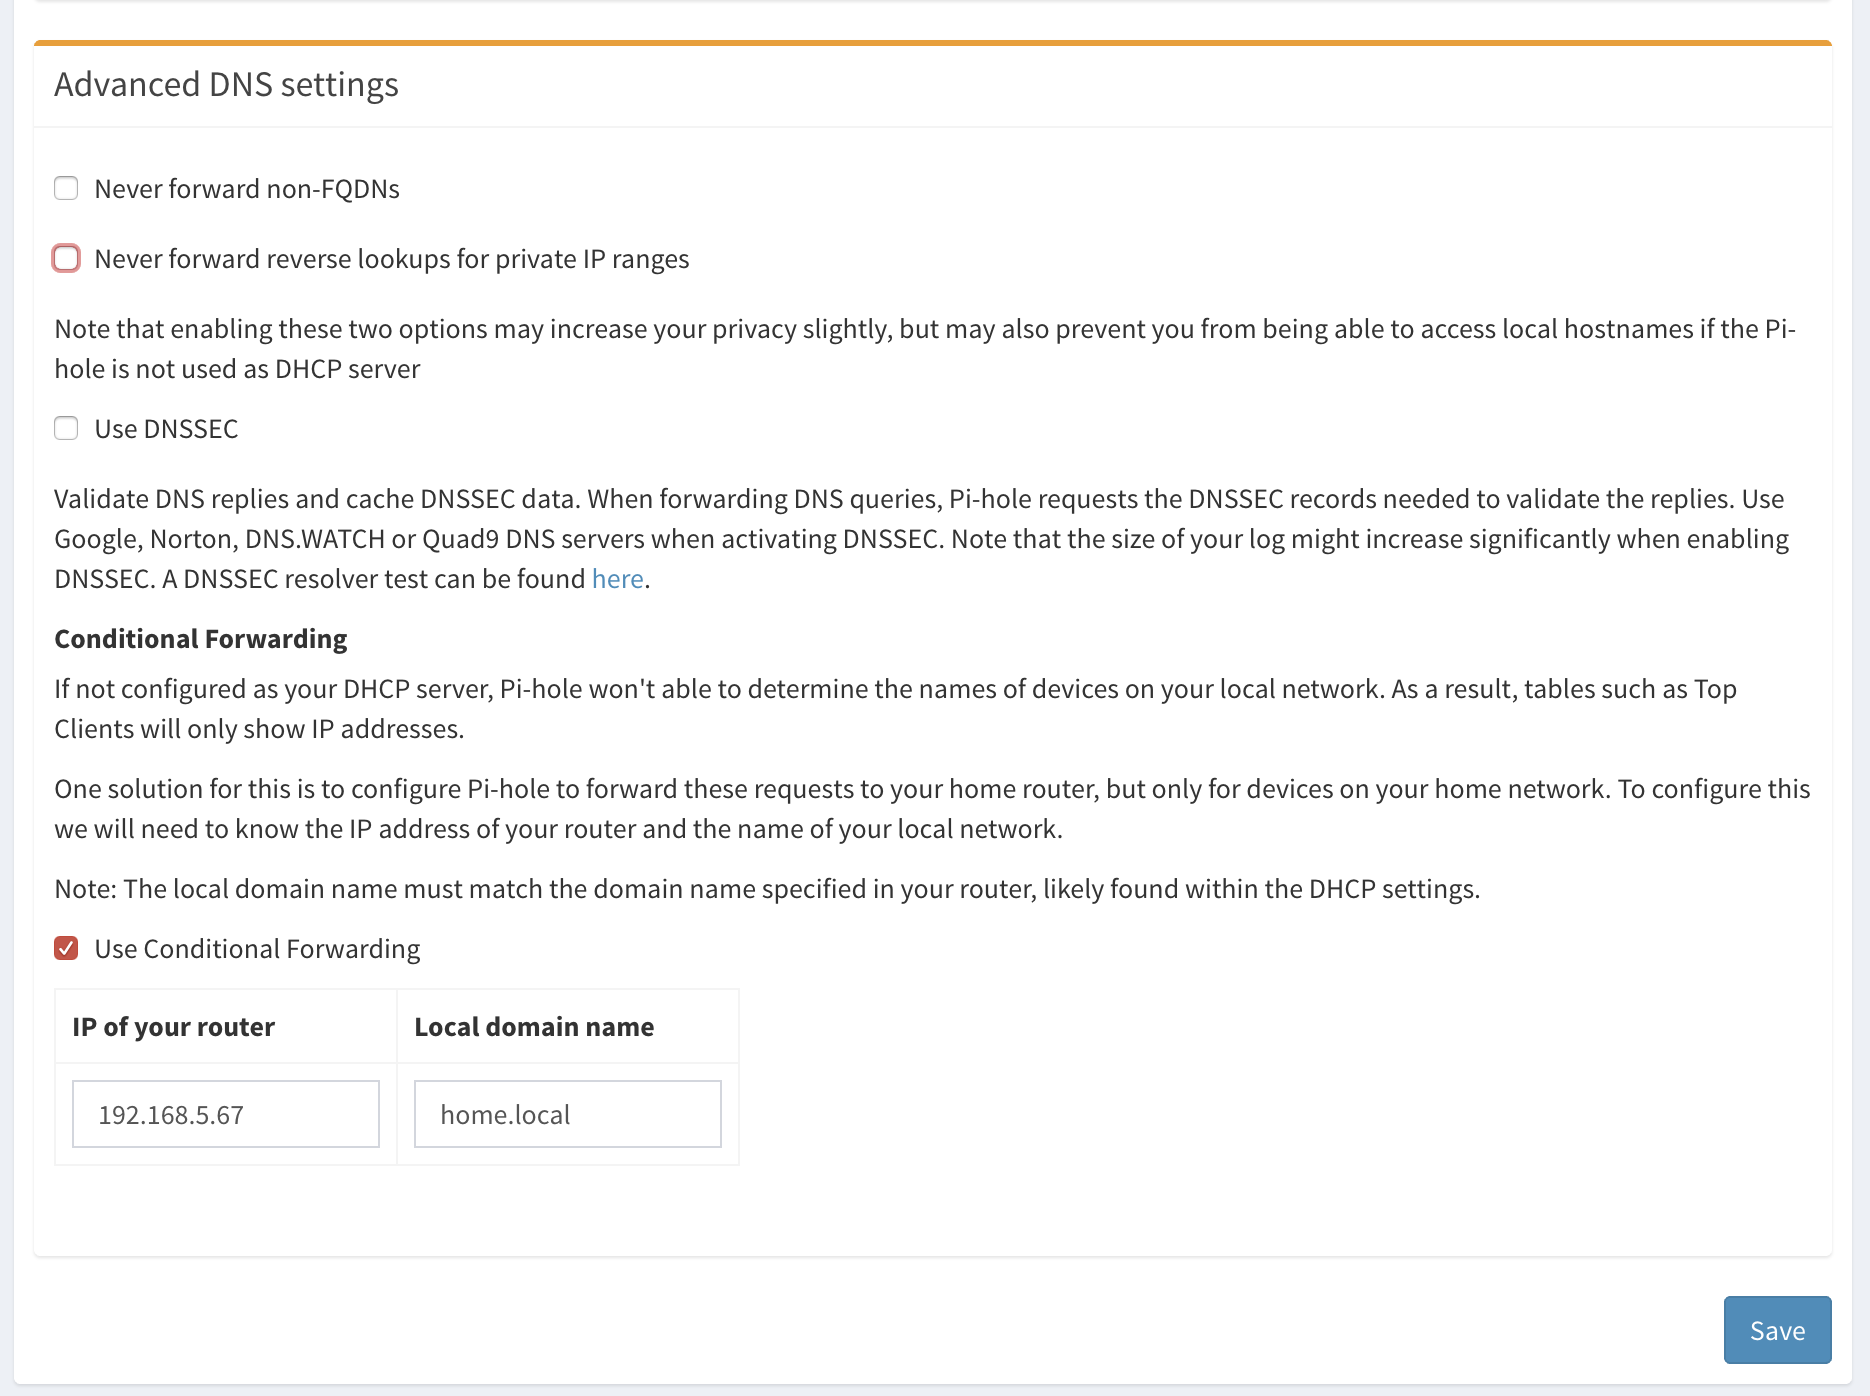
Configuring this to point to your local DNS server, as well as typing in the local domain name, enables Pi-Hole to forward everything that should be local, to the correct DNS server. Disregard the text explaining that you should point it to your router, it should really point to your local DNS resolver (which in many home networks is in fact your router, but not in my case).
I could probably have used external DNS servers for the custom DNS servers for Pi-Hole, and just used this Conditional Forwarding for my local network, but I haven’t tested that and frankly I don’t really care if external DNS queries take an extra hop through the local DNS server after hitting the Pi-Hole.
This setup also allows for ad and tracker free browsing when I VPN to my home network when on the move, since I’m technically just a client in the local network once I’ve connected either from my phone or my laptop — That’s a huge bonus, since not only is my traffic encrypted, it’s also sanitized at the same time.