  1. posts/

Installing and configuring VMware vCenter Operations

 Author
Author
Christian Mohn
IT veteran, podcaster, author, and blogger from Bergen, Norway.
Table of Contents

VMware vCenter Operations was released to the general public a week or so ago and is available for download right now. As usual you can download a 60 day trial, and get started immediately.

Like other recent management utilities from VMware, vCenter Operations comes in the form of a .OVF template (like vCMA/vMA).

Installing VMware vCenter Operations
#

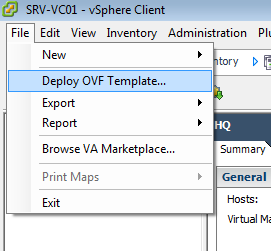
Download VMware vCenter Operations and import by starting vCenter Client, navigate to the “File” menu and select “Deploy OVF template…

vSphere Client File menu with Deploy OVF Template highlighted

Browse to the download location, and find the “VMware-vcops-1.0.0.0-373027_OVF10.ova” file. Select it and click open.
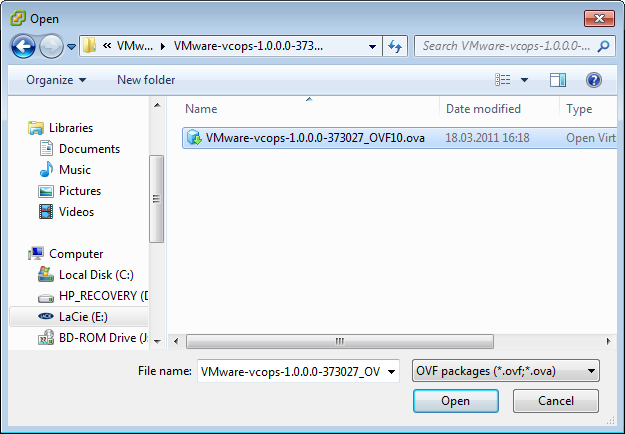
Open file dialog with the VMware-vcops-1.0.0.0-373027_OVF10.ova file selected

Click on “Next” and review the details.
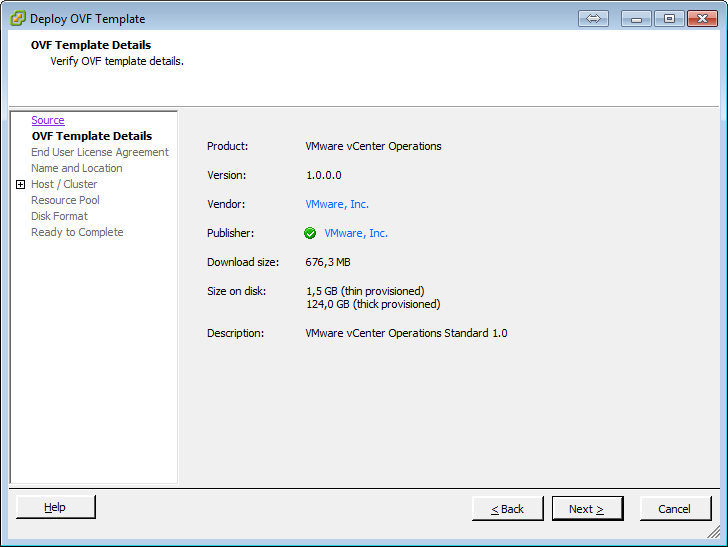
Deploy OVF Template wizard OVF Template Details screen showing product, version and size information

Hit “Next” once more, and click on “Accept” to accept the VMware EULA and enable the “Next” button.
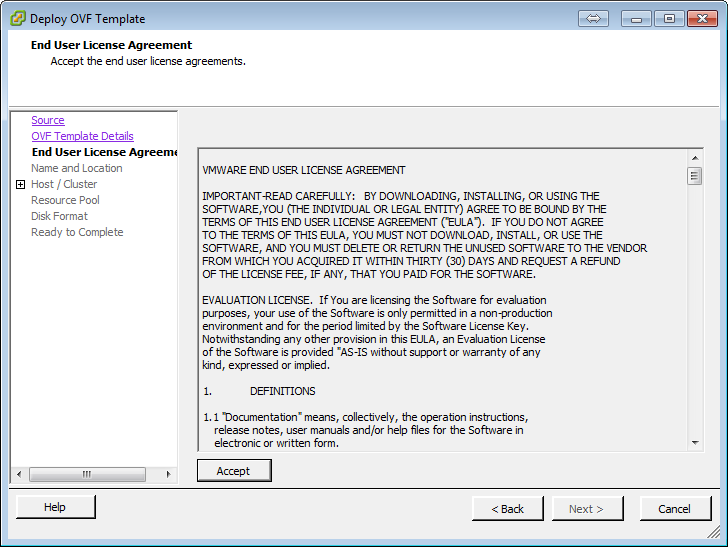
Deploy OVF Template wizard showing the VMware end user license agreement

Specify the name and location of the VMware vCenter Operations VM, and click “Next” to continue.
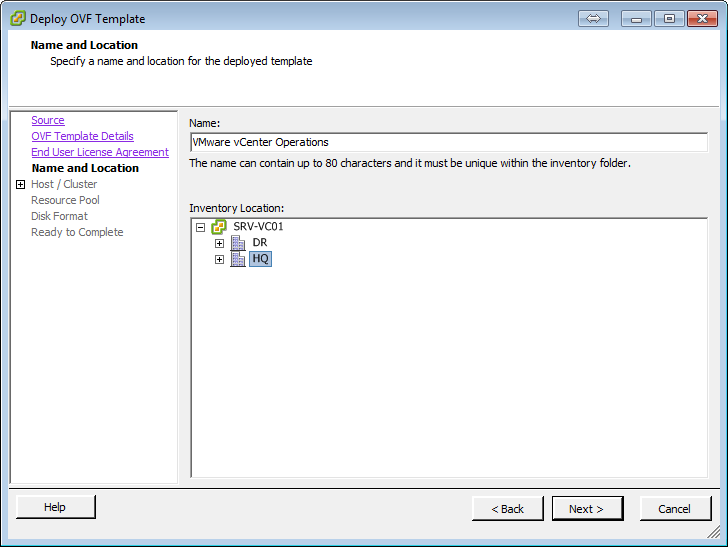
Deploy OVF Template wizard Name and Location screen with VMware vCenter Operations entered
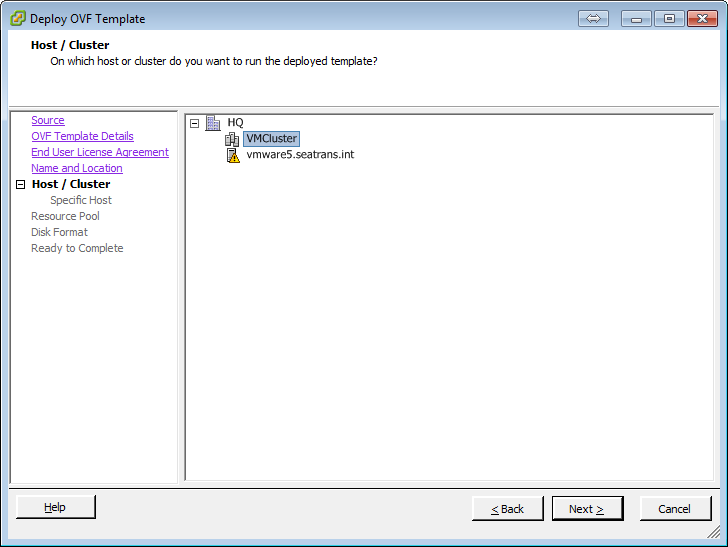
Now we get to select which host or cluster the VM should be deployed to. Make your choices, and click on “Next
Deploy OVF Template wizard Host or Cluster selection screen with VMCluster selected
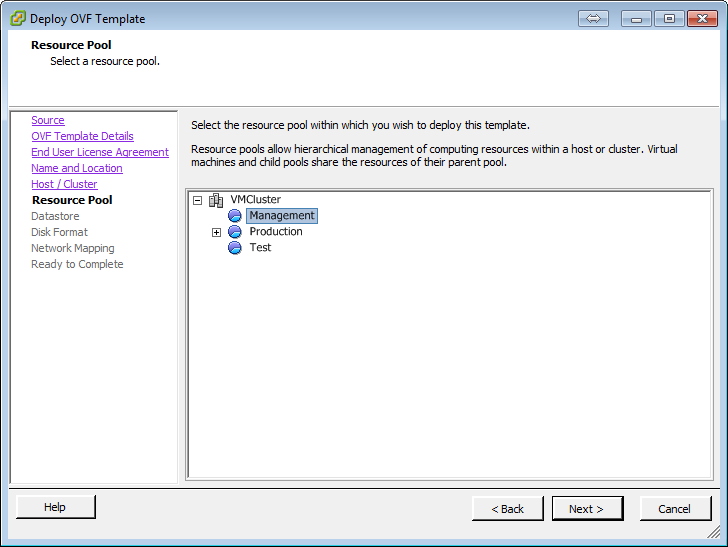
Select your preferred resource pool, if you have any, and once again click “Next
Deploy OVF Template wizard Resource Pool screen with the Management pool selected
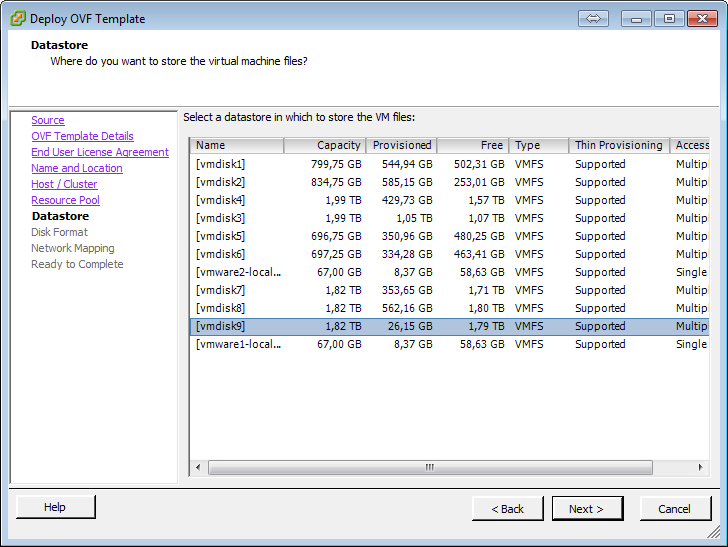
Now select your preferred datastore, and guess what? We get to click “Next” one more time!
Deploy OVF Template wizard Datastore screen with vmdisk9 selected
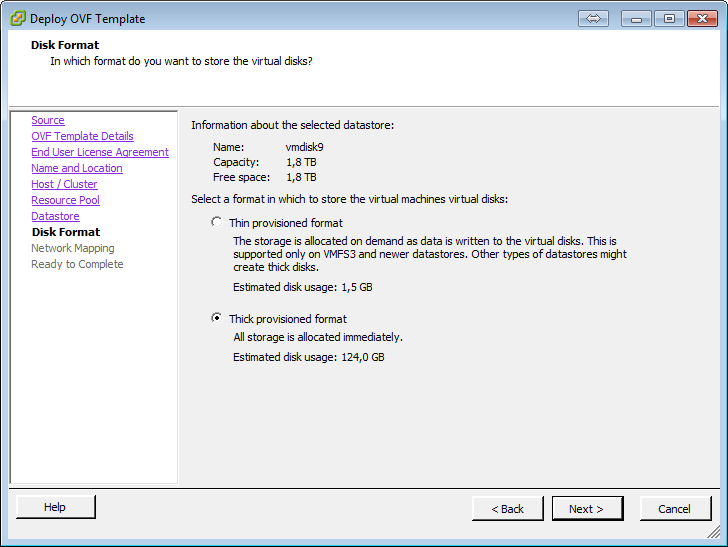
Decide if you want a thin or thick provisioned VM, the default is thick but I went with thin provisioned in this particular setup.
Deploy OVF Template wizard Disk Format screen with thick provisioned format selected
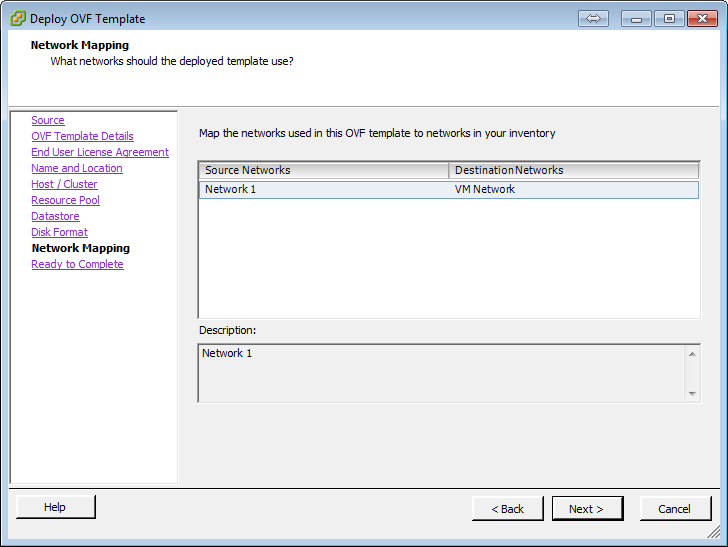
The last configuration item, for now, is to map the networks. Select your network mappings and click on “Next”.
Deploy OVF Template wizard Network Mapping screen mapping Network 1 to VM Network
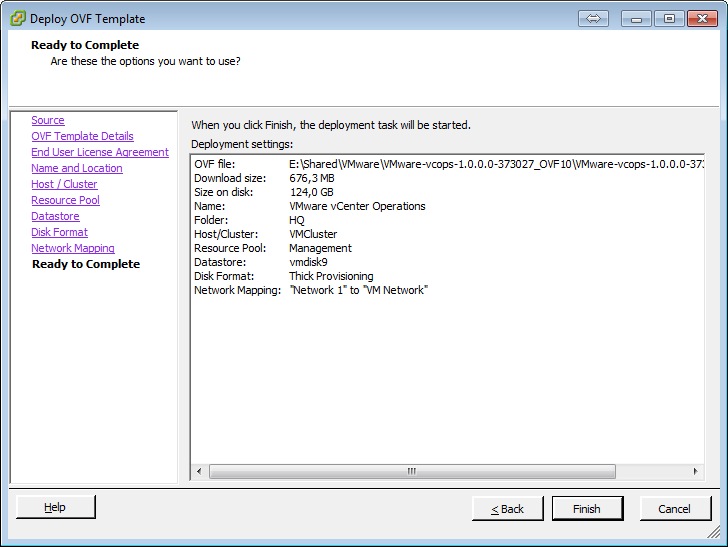
Review the final setup screen, and once you are satisfied that your settings are correct, click on “Finish” to start the OVF template import.
Deploy OVF Template wizard Ready to Complete screen showing the deployment settings summary
The import starts, and after a few minutes it should be ready to go!
Progress dialog showing VMware vCenter Operations deployment at 89 percent
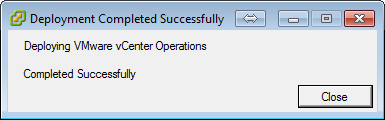
Deployment Completed Successfully dialog for VMware vCenter Operations
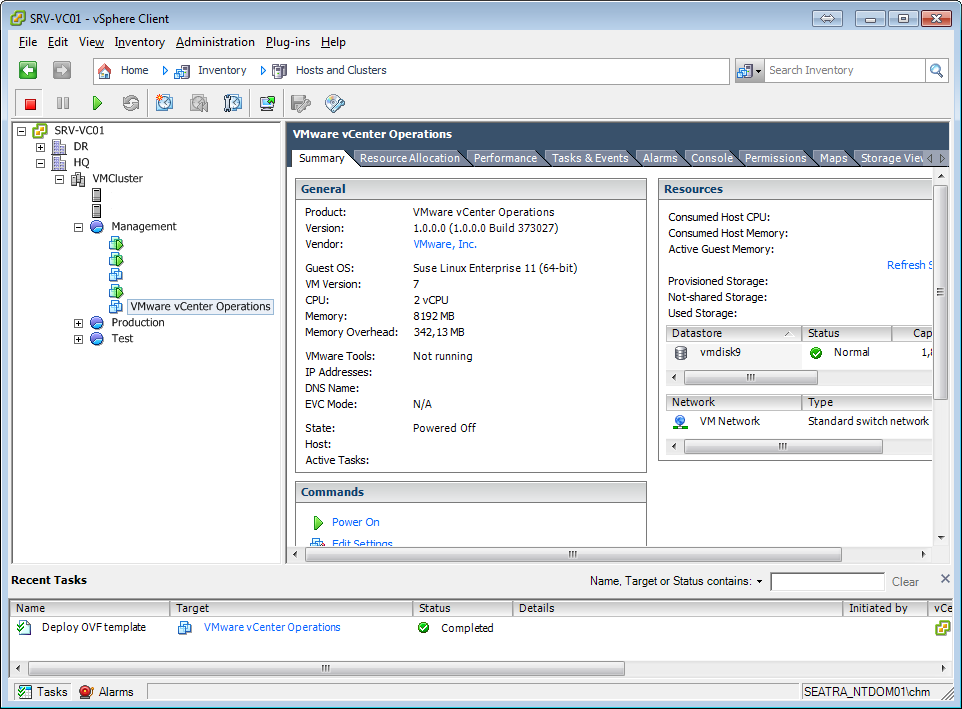
Success!
vSphere Client summary tab for the newly deployed VMware vCenter Operations virtual machine
Time to start it up!

Configuring VMware vCenter Operations
#

After the vCenter Operations VM has finished booting, it displays a little information screen showing the IP address and other tidbits of information. The most important piece of information right now is the DHCP assigned IP address. Make a note of that IP for later.
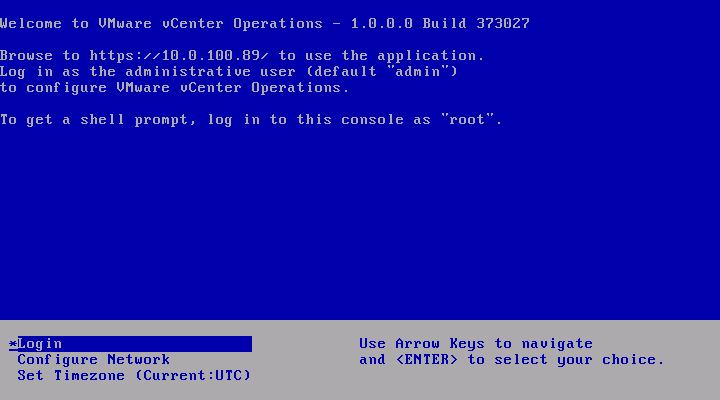
VMware vCenter Operations console welcome screen showing the appliance IP address and login menu

To make sure we don’t run into problems with time synchronization we need to make sure that the vCenter Operations VM time is synchronized with the ESX host time. To do so, right click on the VMware vCenter Operations VM inside of the vCenter Client, select “Edit Settings”.
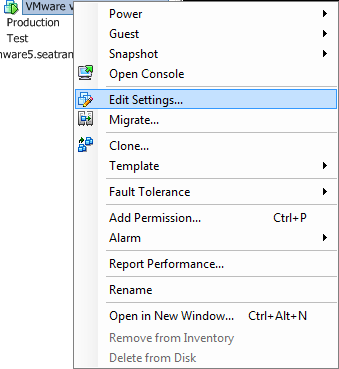
Virtual machine right click context menu with Edit Settings highlighted

Select the “Options” tab, and find the VMware Tools section.
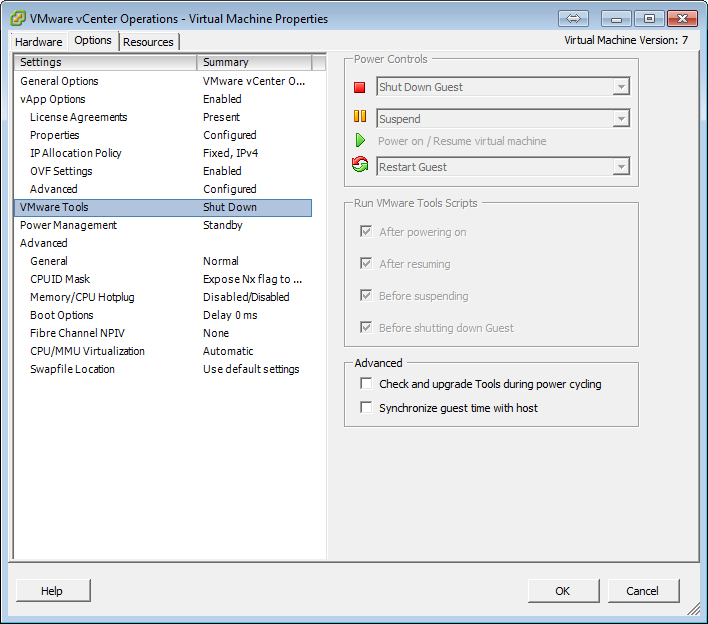
Virtual machine properties Options tab showing VMware Tools power control settings
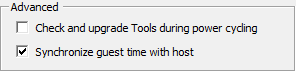
Find the “Synchronize guest time with host” option, and select it.
VMware Tools advanced settings with Synchronize guest time with host enabled
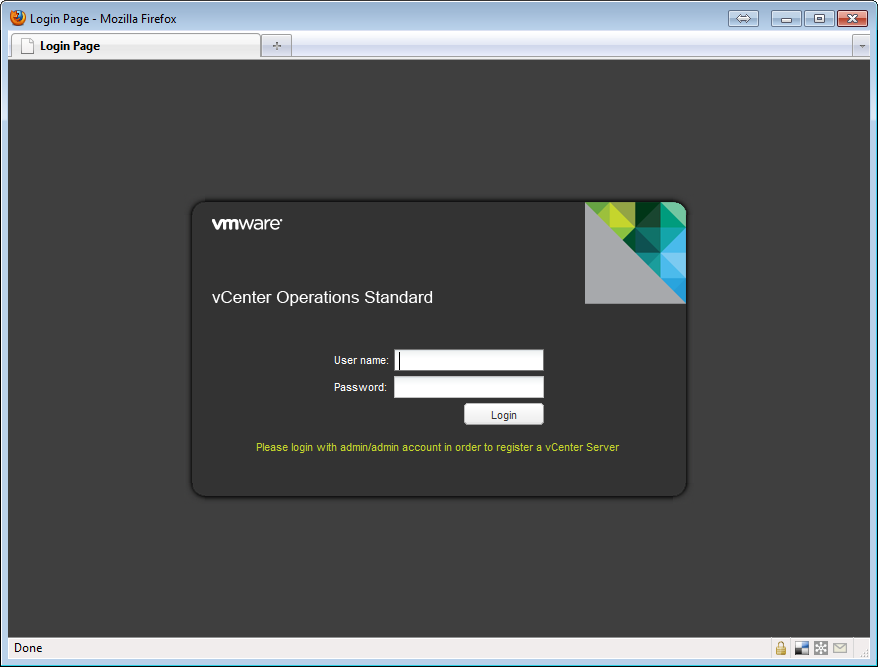
Open the vCenter Operations web page in a browser, and log in. The default username/password for vCenter Operations is admin/admin
vCenter Operations Standard login page in a browser
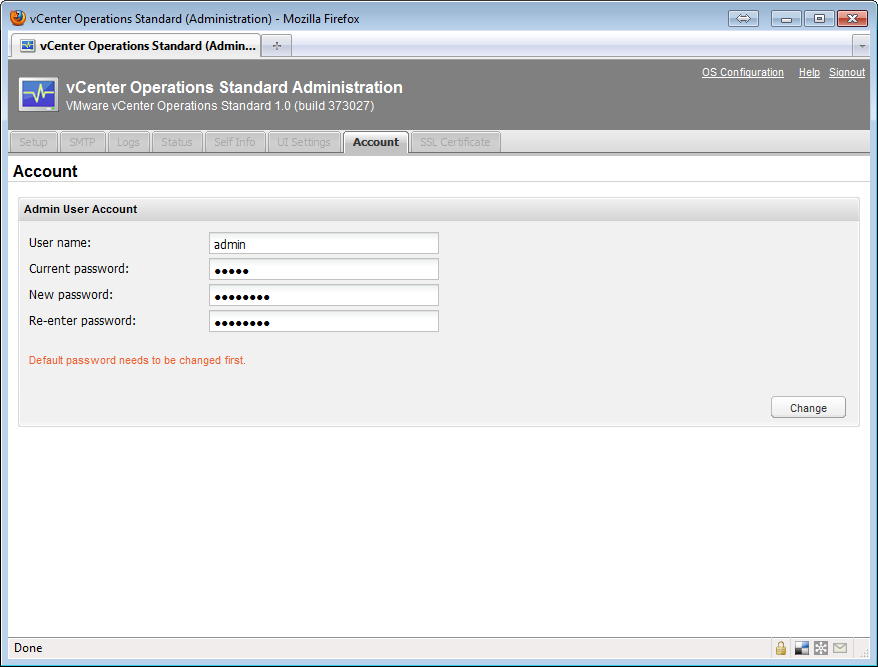
Log in, and follow the directions on screen to change the default username/password.
vCenter Operations Standard Account tab for changing the default admin password
The new password must be at least 8 characters, and at least one digit and one character. Note: This also changes the root account password for the vCenter Operations VM.

Next up is configuring the vCenter Operations connection to the vCenter.

Fill out the vCenter Server information form, with information pertinent to your infrastructure. Note that the registration credentials needs to have administrator privileges on the vCenter Server. You can use the same credentials for both registration and collection, or you can differentiate them if required in your environment.
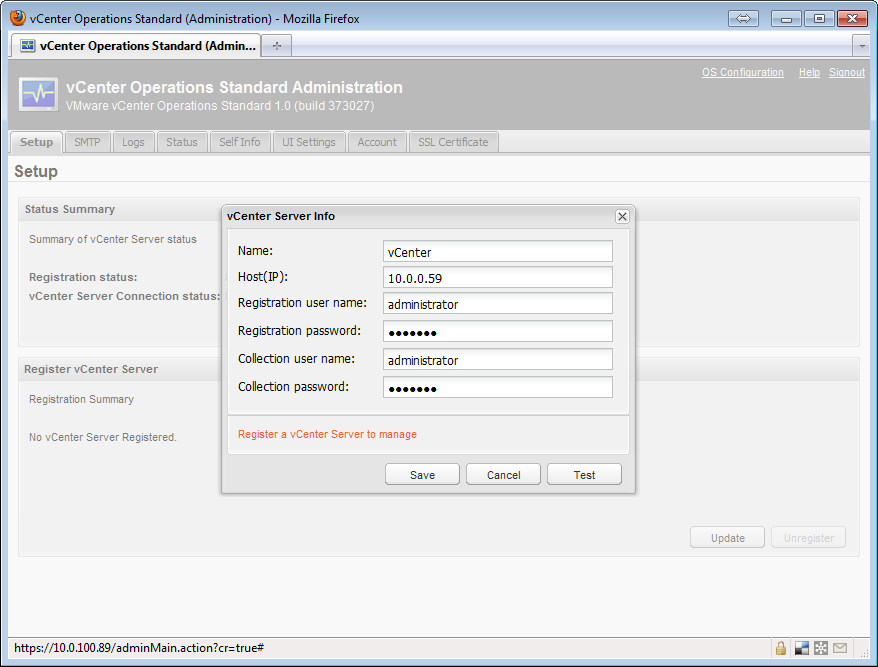
vCenter Server Info form filled in with registration and collection credentials
Click on “Save”, and a test is performed to make sure that the information provided is correct.
vCenter Server Info form showing a connection test in progress
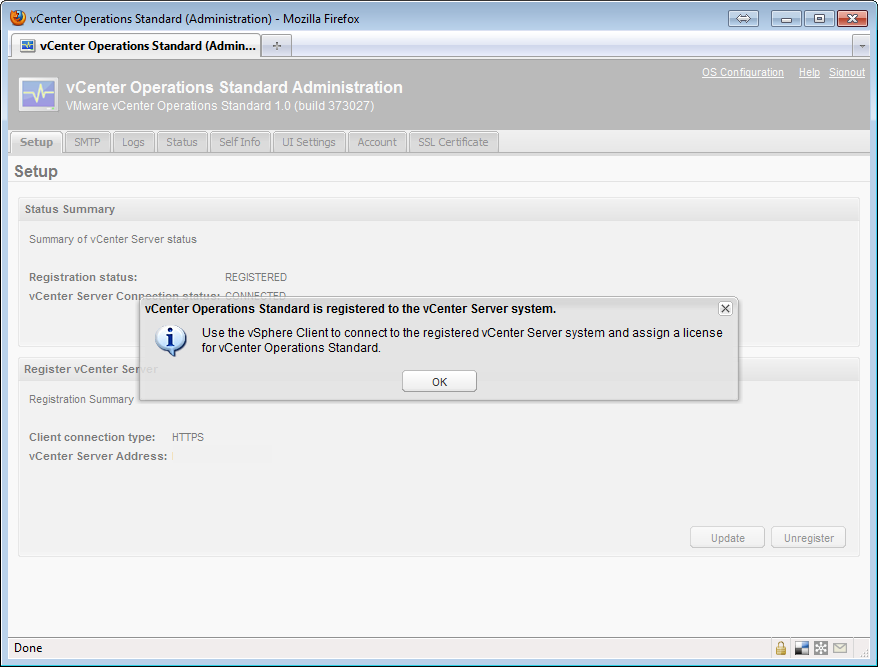
If registration is successful, a new popup appears explaining that you need to use the vSphere Client to assign the vCenter Operations licenses.
Popup confirming vCenter Operations Standard is registered to the vCenter Server
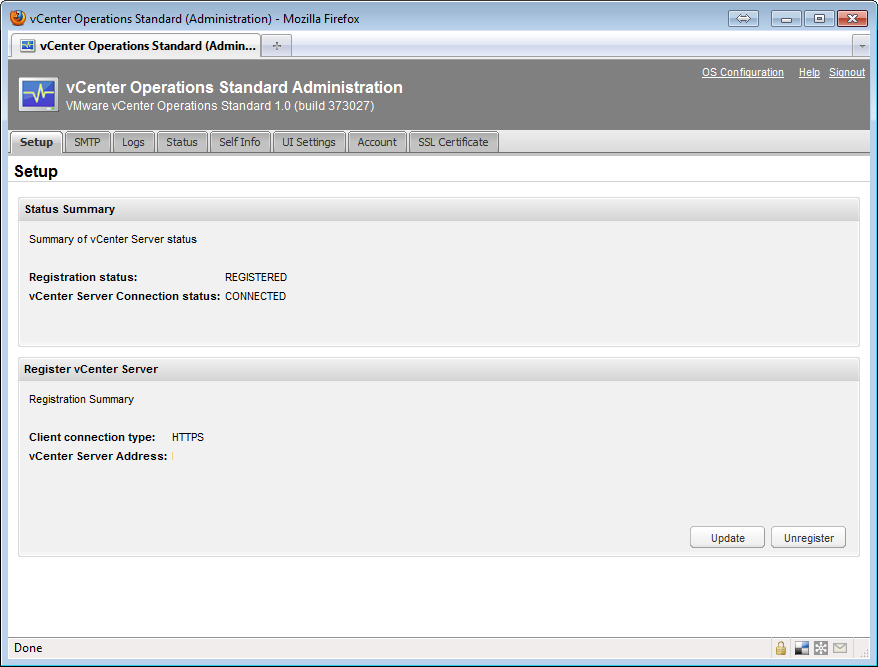
Click on “Ok” and the vCenter Operations setup dashboard appears in your browser.
vCenter Operations Standard Setup screen showing registered and connected status
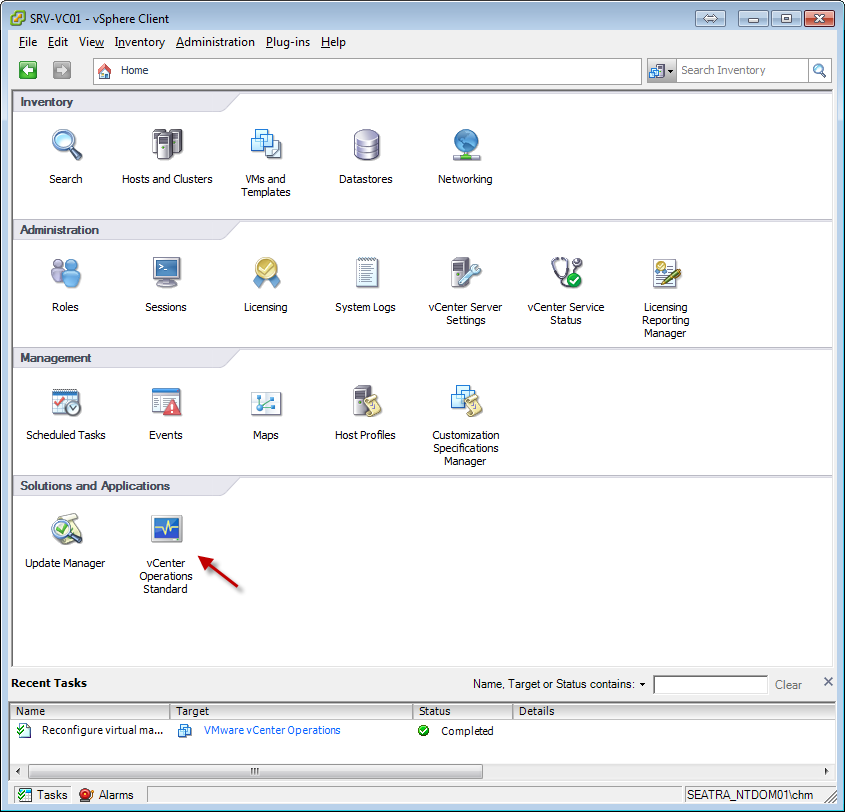
Go back to your vCenter Client and navigate to the “Home” screen.
vSphere Client Home screen with an arrow pointing to the vCenter Operations Standard icon
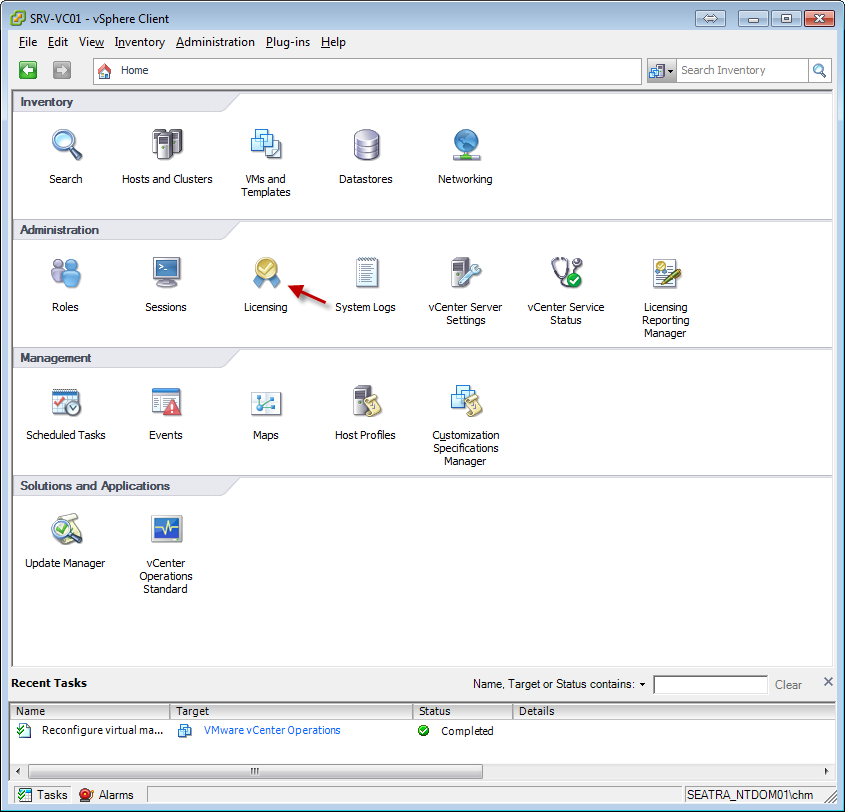
You should now see the new “vCenter Operations” icon under “Solutions and Applications”. If it does not appear immediately, close the vCenter Client and restart it to have it pick up the installation. To install the vCenter Operations license, go to “Home” and find the “Licensing” icon.
vSphere Client Home screen with an arrow pointing to the Licensing icon
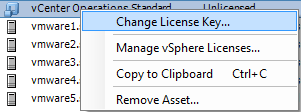
Click on it, and change the “View by:” option to “Asset” Right click on “vCenter Operations” and select “Change License Key
Licensing report with the View by Asset option selected
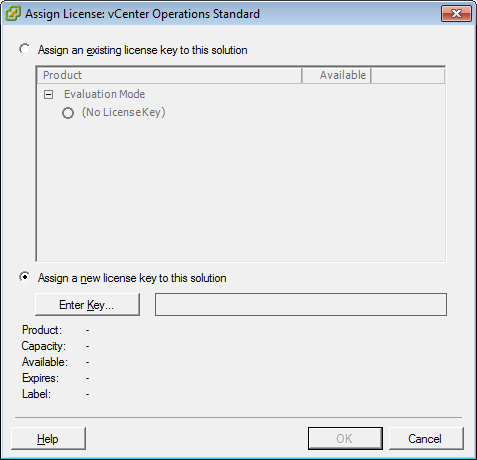
Select “Assign new license key to this solution”, click on “Enter Key…” and enter your license key and optionally a label for the key. Click on “OK” to return to the “Assign License” window, and click on “OK” again to install the license.

Right click menu on the vCenter Operations Standard asset showing Change License Key
Assign License dialog for vCenter Operations Standard with the Enter Key button
Your license should now be installed and active.

Go back to the vCenter Client “Home” screen and find the vCenter Operations icon under “Solutions and Applications”. Click on it, and vCenter Operations should already be active monitoring your infrastructure.
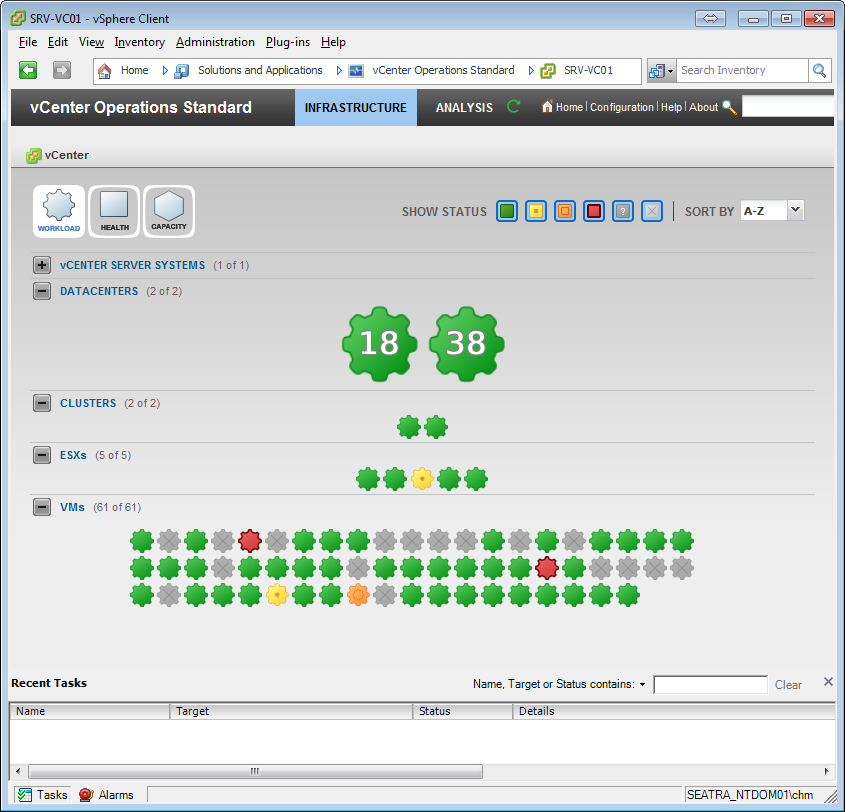
vCenter Operations Standard dashboard showing workload health across datacenters, clusters, hosts and VMs

Thats it! You now have VMware vCenter Operations running in your environment. For details on how it works and reports your operations refer to the VMware vCenter Operations official documentation. Eric Sloof has also posted a couple of great videos in his VMware vCenter Operations - Troubleshooting Workflow post that gives an in-depth overview of what VMware vCenter Operations is capable of doing.

Related