Since moving this site over to Hugo back in 2018, I’ve developed a workflow that seems to work pretty well. Given that I see that a lot of others are also moving over to static site generators, and I wasn’t exactly ahead of the curve on it myself, I figured I would try to write up how I work with Hugo and Visual Studio Code on my MacBook to generate content.
Editor of Choice#
As mentioned, I use Visual Studio Code as my editor, with a set of extensions:
- Hugo Snippets
- Markdown Preview Github Styling
- markdownlint
- Markdown Shortcuts
- Markdown All in One
- Better TOML
- Bootstrap 4, Font awesome 4, Font Awesome 5 Free & Pro snippets
- Paste Image
There is probably some overlap between a couple of these extentions, but it seems to work just fine.
Paste Image Config#
Out of that list I would like to highlight Paste Image as my absolute favorite. In short, it allows for pasting screenshots directly from clipboard, and into a MarkDown document. In addition to this, it also takes care of saving the image in the correct place, which saves a lot of manual work.
All my images reside in /static/img on my local file system, which Hugo then renders as /img/<filename> in the generated URL. This setup also puts the screenshots in /img/name-of-the-markdown-file/ automatically, which makes everything just a bit easier to manage.
"pasteImage.path": "${projectRoot}/static/img/${currentFileNameWithoutExt}",
"pasteImage.namePrefix": "${currentFileNameWithoutExt}_",
"pasteImage.prefix": "/img/",
"pasteImage.basePath": "${projectRoot}/static/img"Hugo#
config.toml#
Within my Hugo config.toml I’ve set code as my preferred editor, like this:
# Set content editor
newContentEditor = "code"
Note, for this to work code needs to be added to your system path"
Hugo Shortcodes#
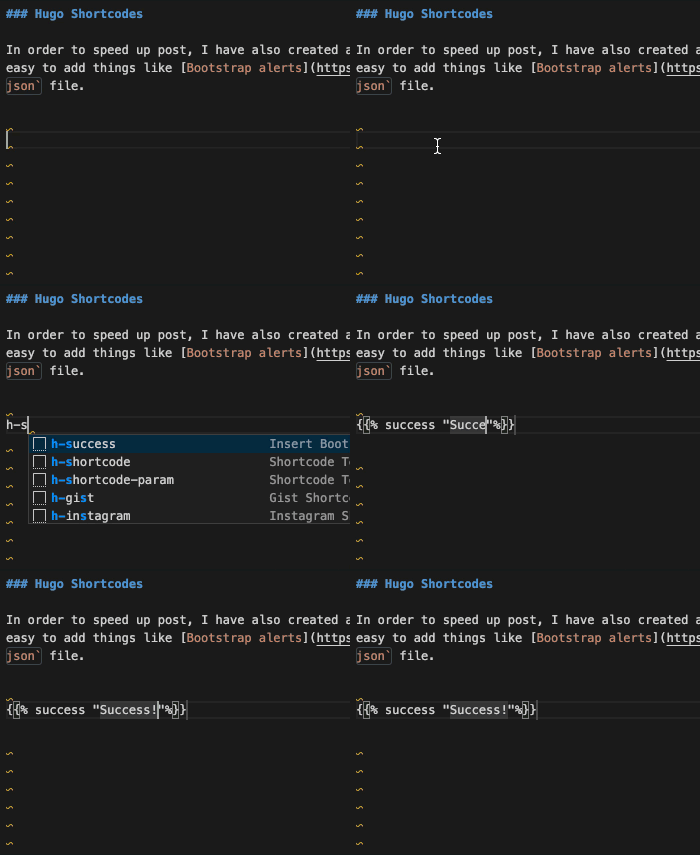
In order to speed up writing posts, I have also created a few custom Hugo shortcodes for Bootstrap4. These makes it easy to add things like Bootstrap alerts in my posts.
These are then added to Visual Studio Code, via the markdown.json file.

The other snippes I use, come from the Hugo Snippets extension.
Custom Zsh aliases and functions#
I have also added a couple of Hugo and site specific aliases and functions to my .zshrc file:
    #Hugo Specific
    local BLOG_PATH=<the path to my Hugo files>
    alias vninjad="cd '$BLOG_PATH'"

    function vninjaserv() {
        cd $BLOG_PATH
        open "/Applications/Google Chrome.app" http://localhost:1313
        hugo server -D -F
    }
    function hugonew() {
        cd $BLOG_PATH && hugo new content/post/$1.md
    }

    # Image Optimization
    alias imgoptim="/Applications/ImageOptim.app/Contents/MacOS/ImageOptim"
BLOG_PATH is just a variable that holds the location of the local Hugo files. vninjad, basically just lets me jump into my local file location for this site. vninjaserv jumps to the same directory, opens Chrome for local previews, and starts the local Hugo server.
hugonew jumps to the same location as vninjad, but it also runs the Hugo command to create a new post with a name, given in the argument. For example, to create this very post, I ran hugonew my-hugo-workflow. This pops up Visual Studio Code, since that’s the editor I’ve defined in config.toml, with my predefined front matter template for posts. If you want to specify which editor to use, you can add --editor="<your_editor>" to the end of the line.
imgoptim basically just calls ImageOptim from the command line, and let’s me automatically optimize the images in a given directory, which is really useful in combination with the automatic screenshot features that Paste Image provides.
All in all, pretty awesome and it does make it really quick to write something especially when you can have your terminal window available right in Visual Studio Code!
Once I’m happy with something locally, I’ll just commit it to GitHub and let Netlify take care of the rest.
