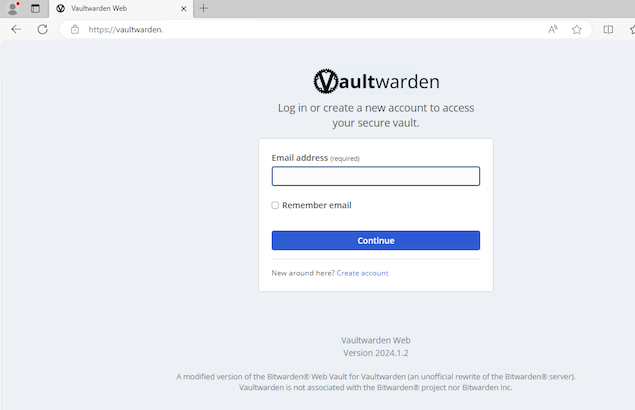
In my work lab environment, we have a need to share passwords and other login credentials among the team who uses it. Recently we decided to try out using Vaultwarden for this purpose.
Linuxiac.com has a great guide on setting up Vaultwarden with Caddy, with Docker Compose, but this particular setup relies on Let’s Encrypt SSL certificates. Let’s Encrypt is great, but requires some online presence, which we don’t want for this environment. In addition that we have an internal Microsoft CA based PKI infrastructure that we wanted to use for this purpose.
The setup follows the guide mentioned above, with some tweaks to utilize the internal PKI infrastructure. This includes the use of Caddy as a reverse proxy. Specifically, it uses caddy-docker-proxy which allows for Caddy configuration via labels in the Docker configuration.
Generating Certificates for Vaultwarden from a Microsoft CA#
First off, we need to create a Certificate Signing Request (CSR) for the Vaultwarden service. This CSR then needs to be processed on the Microsoft CA in order for it to create a certificate that we can use in Caddy.
The following steps were performed on the Linux VM (Photon OS) hosting the Vaultwarden+Caddy Docker configuration:
Creating a private key#
We need a private key to sign the Certificate Signing Request (CSR) with. This can easily be created with the following command:
openssl genrsa -out vaultwarden.key 2048
This generates a key file without any password protection, and is not recommended for production use. Check the OpenSSL documentation for recommended practices.
Generating a Certificate Signing Request (CSR) with Subject Alternative Name (SAN)#
In order for modern browsers to accept the certificate it gets presented, the Subject Alternative Name (SAN) needs to be supplied. For OpenSSL to be able to create a CSR which contains that information, an OpenSSL .cnf file needs to be provided.
I called mine vaultwarden.cnf and placed it in my current working directory.
[req]
distinguished_name = req_distinguished_name
req_extensions = req_ext
prompt = no

[req_distinguished_name]
C = NO
ST = Vestland
L = Bergen
O = Lab
OU = Lab
CN = vaultwarden.<mydomain>

[req_ext]
subjectAltName = @alt_names

[alt_names]
IP.1 = 172.16.4.15
DNS.1 = vaultwarden.<mydomain>
DNS.2 = vaultwarden
The values in this file needs to be updated to reflect the environment it is being deployed in.
The SAN is defined under [alt_names], and I included both the IP address, the FQDN and the hostname to cover all my bases. These names coincide with the name defined in our internal DNS, as well as the values used in the docker-compose.yaml file that comes from the How to Install Vaultwarden Password Manager with Docker guide.
Generating the CSR is then done by running the following command, utilizing the .key and .cnf file created earlier.
openssl req -new -key vaultwarden.key -out vaultwarden.csr -config vaultwarden.cnfThe result is a new file, called vaultwarden.csr that needs to be submitted to the Microsoft CA to generate the certificate.
Submitting the CSR to the Microsoft CA with certreq#
Copy the generated vaultwarden.csr file to your Microsoft CA. From there use certreq to submit it to the CA. I have a Certificate Template called WebServer2Y that was used to generate the certificate.
The command used was (replace ca-name\Issuing CA01 with correct values for your environment)
certreq -submit -config "ca-name\Issuing CA01" -attrib "CertificateTemplate:WebServer2Y" .\vaultwarden.csr .\vaultwarden.cer`This generates the vaultwarden.cer certificate in the current working directory.
Configuring Caddy to use the new certificate, in docker-compose.yaml#
In order for Caddy to use the new certificate (vaultwarden.cer) and key (vaultwarden.key) the files needs to be copied to the correct location based on the docker-compose.yaml setup.
By default /data/caddy/ in this setup maps to /var/lib/docker/volumes/vaultwarden_caddy_data/_data/caddy/ on the physical filesystem, so I created the /var/lib/docker/volumes/vaultwarden_caddy_data/_data/caddy/tls/ folder and copied the vaultwarden.cer and vaultwarden.key files to that location.
Edit docker-compose.yaml and add caddy.tls under labels, with a relative path to the vaultwarden.cer and vaultwarden.key files:
    labels:
      ...
      caddy.tls: /data/caddy/tls/vaultwarden.cer /data/caddy/tls/vaultwarden.key
Configuring caddy.tls to use the local certificate and key, turns off the Caddy default of connecting to Let’s Encrypt and trying to get a public certificate.
Once that whole task was complete, starting Caddy and Vaultwarden with docker-compose up -d works as intended, and the Vaultwarden interface is available with an internally signed and valid certificate.
root@vaultwarden [ ~/vaultwarden ]# docker-compose up -d
[+] Running 2/2
 ✔ Container reverse-proxy  Started
 ✔ Container vaultwarden    Started