It was finally time to replace my old UniFi Security Gateway (USG) 3P with it’s shiny new brother, the Gateway Lite (UXG-Lite).
The USG 3P has served me well over the last 5 or so years, but as the new UXG-Lite promises better throughput especially when enabling IDS/IPS it was time to replace it. In addition to the routing performance improvements, the UXG-Lite also offers WireGuard VPN support out of the box, which will allow me to get rid of my old L2TP VPN setup.
I am sure there are other new features available, that I have not investigated yet.
Here’s how I migrated my entire home network from the USG-3P to the new UXP-Lite, with nothing more than a couple of minutes downtime in total.
I utilize Hostfi for my Unifi controller needs, if you use a local Cloud Key the procedure might differ.
USG to UXG-Lite Migration Procedure using a Temporary Site on Hostifi#
- Create a new temporary Site on Hostifi
- Connect UXG-Lite besides my existing USG-3P, on the WAN port. Luckily I have a fiber connection with more than one IP, so I could connect it besides the existing gateway.
- Connect the LAN port on the UXG-Lite directly to an ethernet adapter on a laptop or desktop computer
- Verify that a 192.168.1.x IP is assigned ethernet adapter
- Open https://192.168.1.1
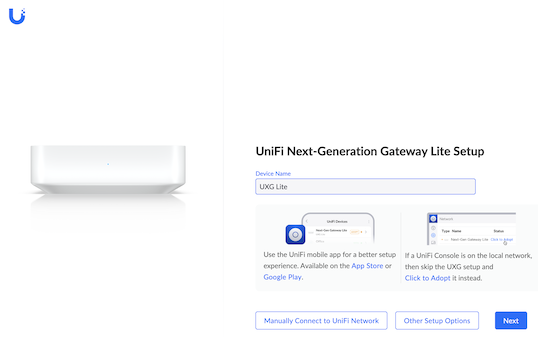
- Select “Manually Connect to UniFi Network”
- Enter Hostifi FQDN, and credentials
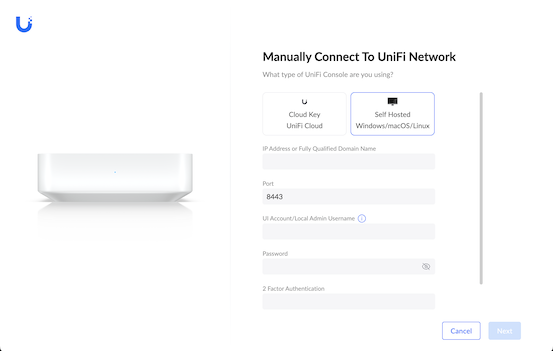
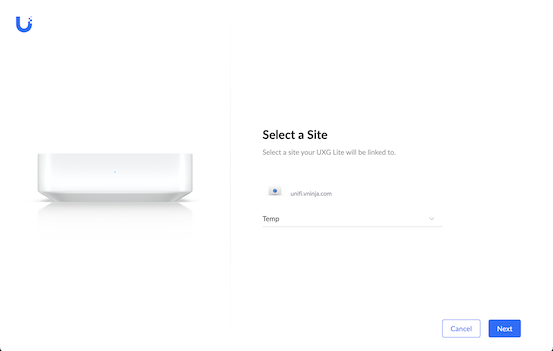
Select the Temporary site to assign UXG-Lite to
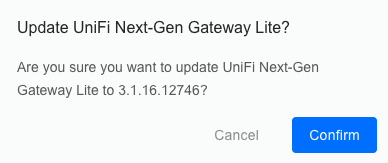
Log into Hostifi and update UXG-Lite (if required). Mine was on 3.1.15, newest available was 3.1.6.12746
- Once that was done, I went back to my original site and removed the UGP-3P from my site, while still connected to my USX-Lite.
- I then disconnected the UGP-3P from my network, both WAN and LAN cables.
- The next step was going back to my temporary site, and moving the UXG-Lite to my original site.
- After a minute or two of downtime, I was back online with my laptop, and the UXG-Lite was now the main gateway in my original site.
- The last step was connecting my LAN ethernet cable to my switch, and disconnect it from my laptop.
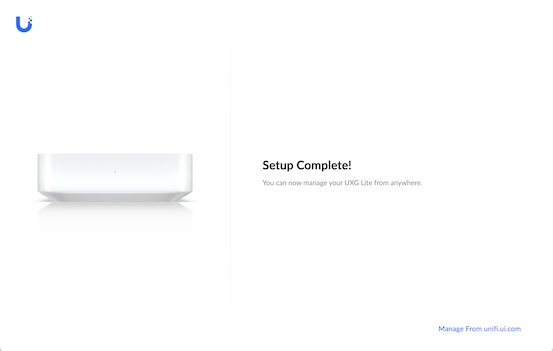
Once these steps were completed, the new UXG-Lite was online and enrolled into my Unifi site. All my previous configuration was retained as they were, and my UniFi network was up and running again within minutes.
All in all, a very seamless and straight forward procedure with minimal downtime.