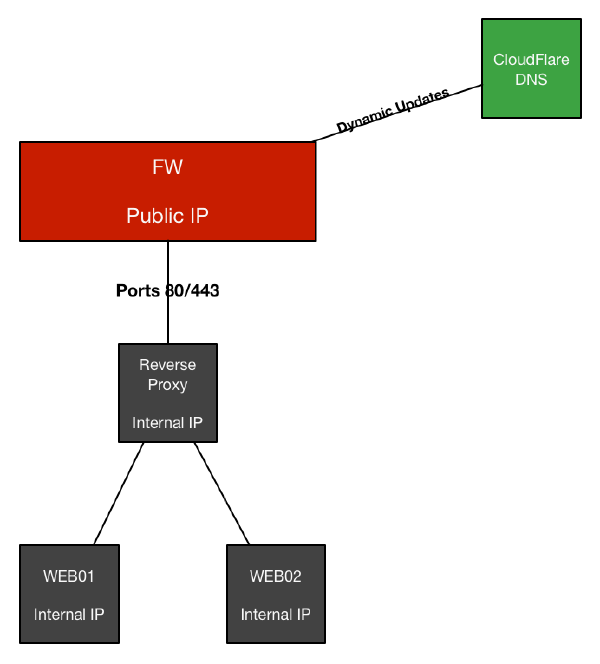
In my previous post, I tried to lay out the foundation and reasoning behind requiring a Dynamic DNS Service, and here is how I solved it using CloudFlare.
First of all, I moved my chosen domain name to CloudFlare, and made sure everything resolved ok with static records. Once that was working, I started playing around with the CloudFlare API, using Cocoa Rest Client. I’m no developer (as is probably very apparent by the script below), nor API wizard of any kind, but it was fairly easy figuring out how to craft a request that lists my DNS zone.
By using the List DNS Records query, I found the unique ID for the hostnames I wanted to update, and created a new Update DNS record query to update it with a new IP address. Since the Cocoa Rest Client is pretty clever, it has an option to “Copy Curl Command”, that basically gives you a preformatted curl command to run the query you just crafted in it. Pasting that into a Terminal window on my Mac, verified that it worked as intended. From there on, I simply wrapped these commands in a little bash script, to avoid hitting the API unless there was an actual public IP change.
In the end, my script ended up looking like this.
UPDATE:#
I’ve published a more fleshed out script on GitHub, details here.
NOTE: You will need to fill out your own values for {TOKEN}, {EMAIL}, {DOMAIN}, {ID} and {HOSTNAME} in line 18 and 21 for this to work for you.
cloudflare-ddns.sh
#!/bin/sh

#get public ip

MYIP=$(curl ifconfig.me/ip)
OLDIP=`cat oldip.txt`

echo "Current public IP is:" $MYIP

if [ "$MYIP" = "$OLDIP" ]
then
echo "No change detected. Exiting"
else

echo "IP change detected, updating CloudFlare"

#WEB01
curl -k -L -X POST -H 'Content-Type: application/x-www-form-urlencoded' -d 'a=rec_edit&tkn={TOKEN}&email={EMAIL}&z={DOMAIN}&id={ID}&type=A&name={HOSTNAME}&ttl=1&content='$MYIP 'https://www.cloudflare.com/api_json.html'

#WEB02
curl -k -L -X POST -H 'Content-Type: application/x-www-form-urlencoded' -d 'a=rec_edit&tkn={TOKEN}&email={EMAIL}&z={DOMAIN}&id={ID}&type=A&name={HOSTNAME}&ttl=1&content='$MYIP 'https://www.cloudflare.com/api_json.html'

echo $MYIP > oldip.txt
fiExplanation#
First off, the script checks what the current public IP is (line 5), then goes on to compare that with the stored IP address in the oldip.txt file (line 10).
If it matches, it ends execution as there is no need to update the public records. If there is a mismatch between the two, it goes on to execute the request to CloudFlare, replacing the currently configured IP with the new IP address stored in the $MYIP variable (lines 17-21).
It then writes the new IP address to the oldip.txt file (line 23) and exits.
Configure this as a cronjob the runs every 5 - 10 minutes or so and you’re set! Simple, not pretty, but oh-so awesome!