I’ve recently standardized on Ubiquiti equipment in the new house, and so far I am very happy with it. Wireless is working flawlessly, which is more than I could say for my old setup.
A part of the new setup is a UniFi® Security Gateway (USG) that I am using as my gateway/firewall for my fiber connection, so I thought why not use that a my VPN termination as well? OpenVPN has been my weapon of choice for years, and it has been doing it very well, but it seems a bit overkill to run an entire VM to provide that service — as well as the ongoing maintenance it requires in terms of OS-patching and so on. Note that all screenshots are from UniFi Controller v5.10.20
On the USG there are basically 2 (well 3, but who’s counting) steps required to set up the VPN connection for Remote Users:
The following information was correct at the time of posting, based on a setup with 1 x UniFi Security Gateway 3P (4.4.41.5193700), 1 x UniFi Switch 8 POE-60W (4.0.42.10433) and 5 x UniFi AP-AC-Mesh (4.0.42.10433)
1. Configuring the UniFi RADIUS server#
In order to be able to authenticate users, the UniFi RADIUS Server needs to be enabled and configured. This is done by navigating to the UniFi Controller, and going to Settings->Services->RADIUS and the Server tab:
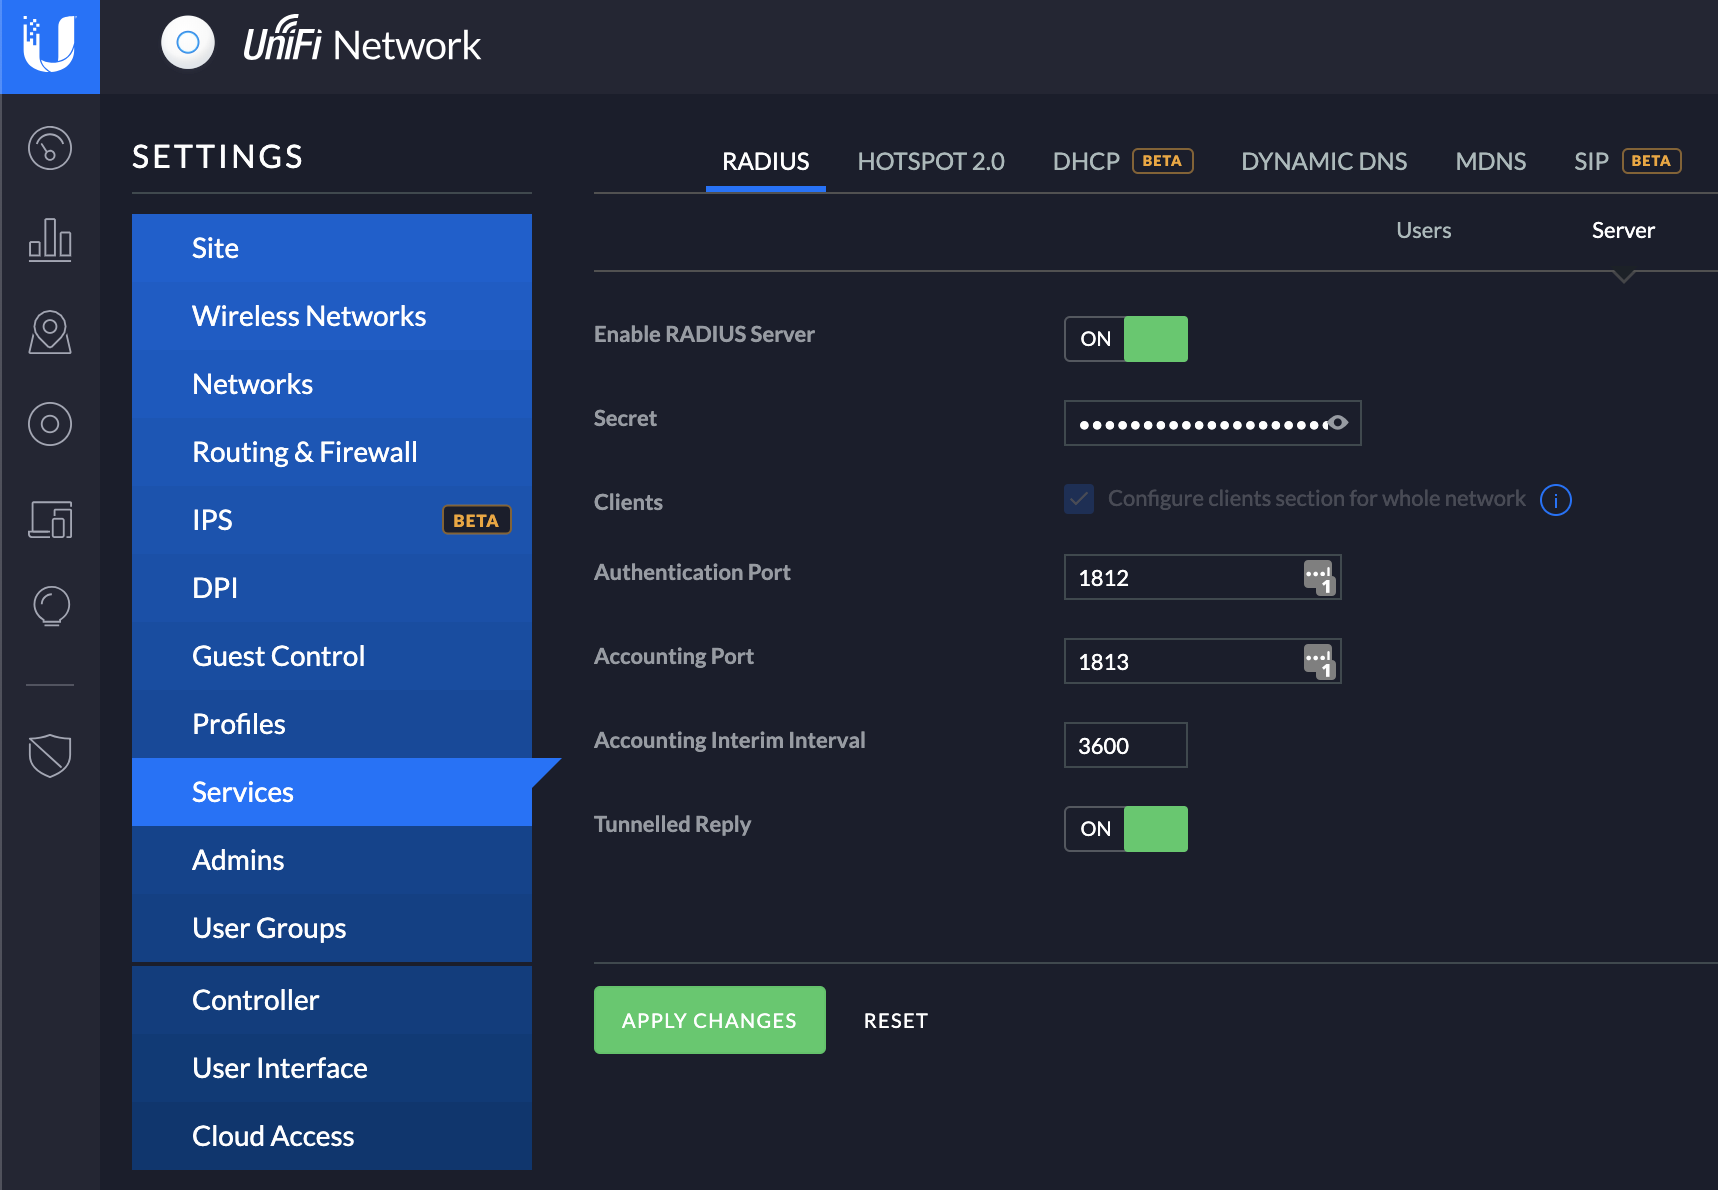
Enable the server, if it isn’t already. I used all the default settings here, except for the Secret. The Secret here is a custom pre-shared key that Radius uses to authenticate devices and users with the service. Define this as you see fit, or use a generator to create it. Put in your values, and hit Apply Changes
1.1 Creating a RADIUS user account#
Navigate to Settings -> Services -> RADIUS and find the Users tab and hit the +Create New Users button. This will bring up the option to create a new user, simply fill out the desired username and password here. For this post I’ll just leave the VLAN part empty, but it allows you to put your VPN clients into different VLANS if you so desire (which is pretty nifty actually!)
For Tunnel Type use 3 - Layer Two Tunneling Protocol (L2TP) and for Tunnel Medium Type use 1 - IPv4 (IP Version 4)

And that’s both your RADIUS server and first user account taken care of!
2. Creating a remote user network#
Next up is defining a network for the remote users. This is a simple, but very powerful step. Navigate to Settings->Networks and click on the +Create New Network button. This, naturally, brings up the Create New Network screen where you can put in your details.
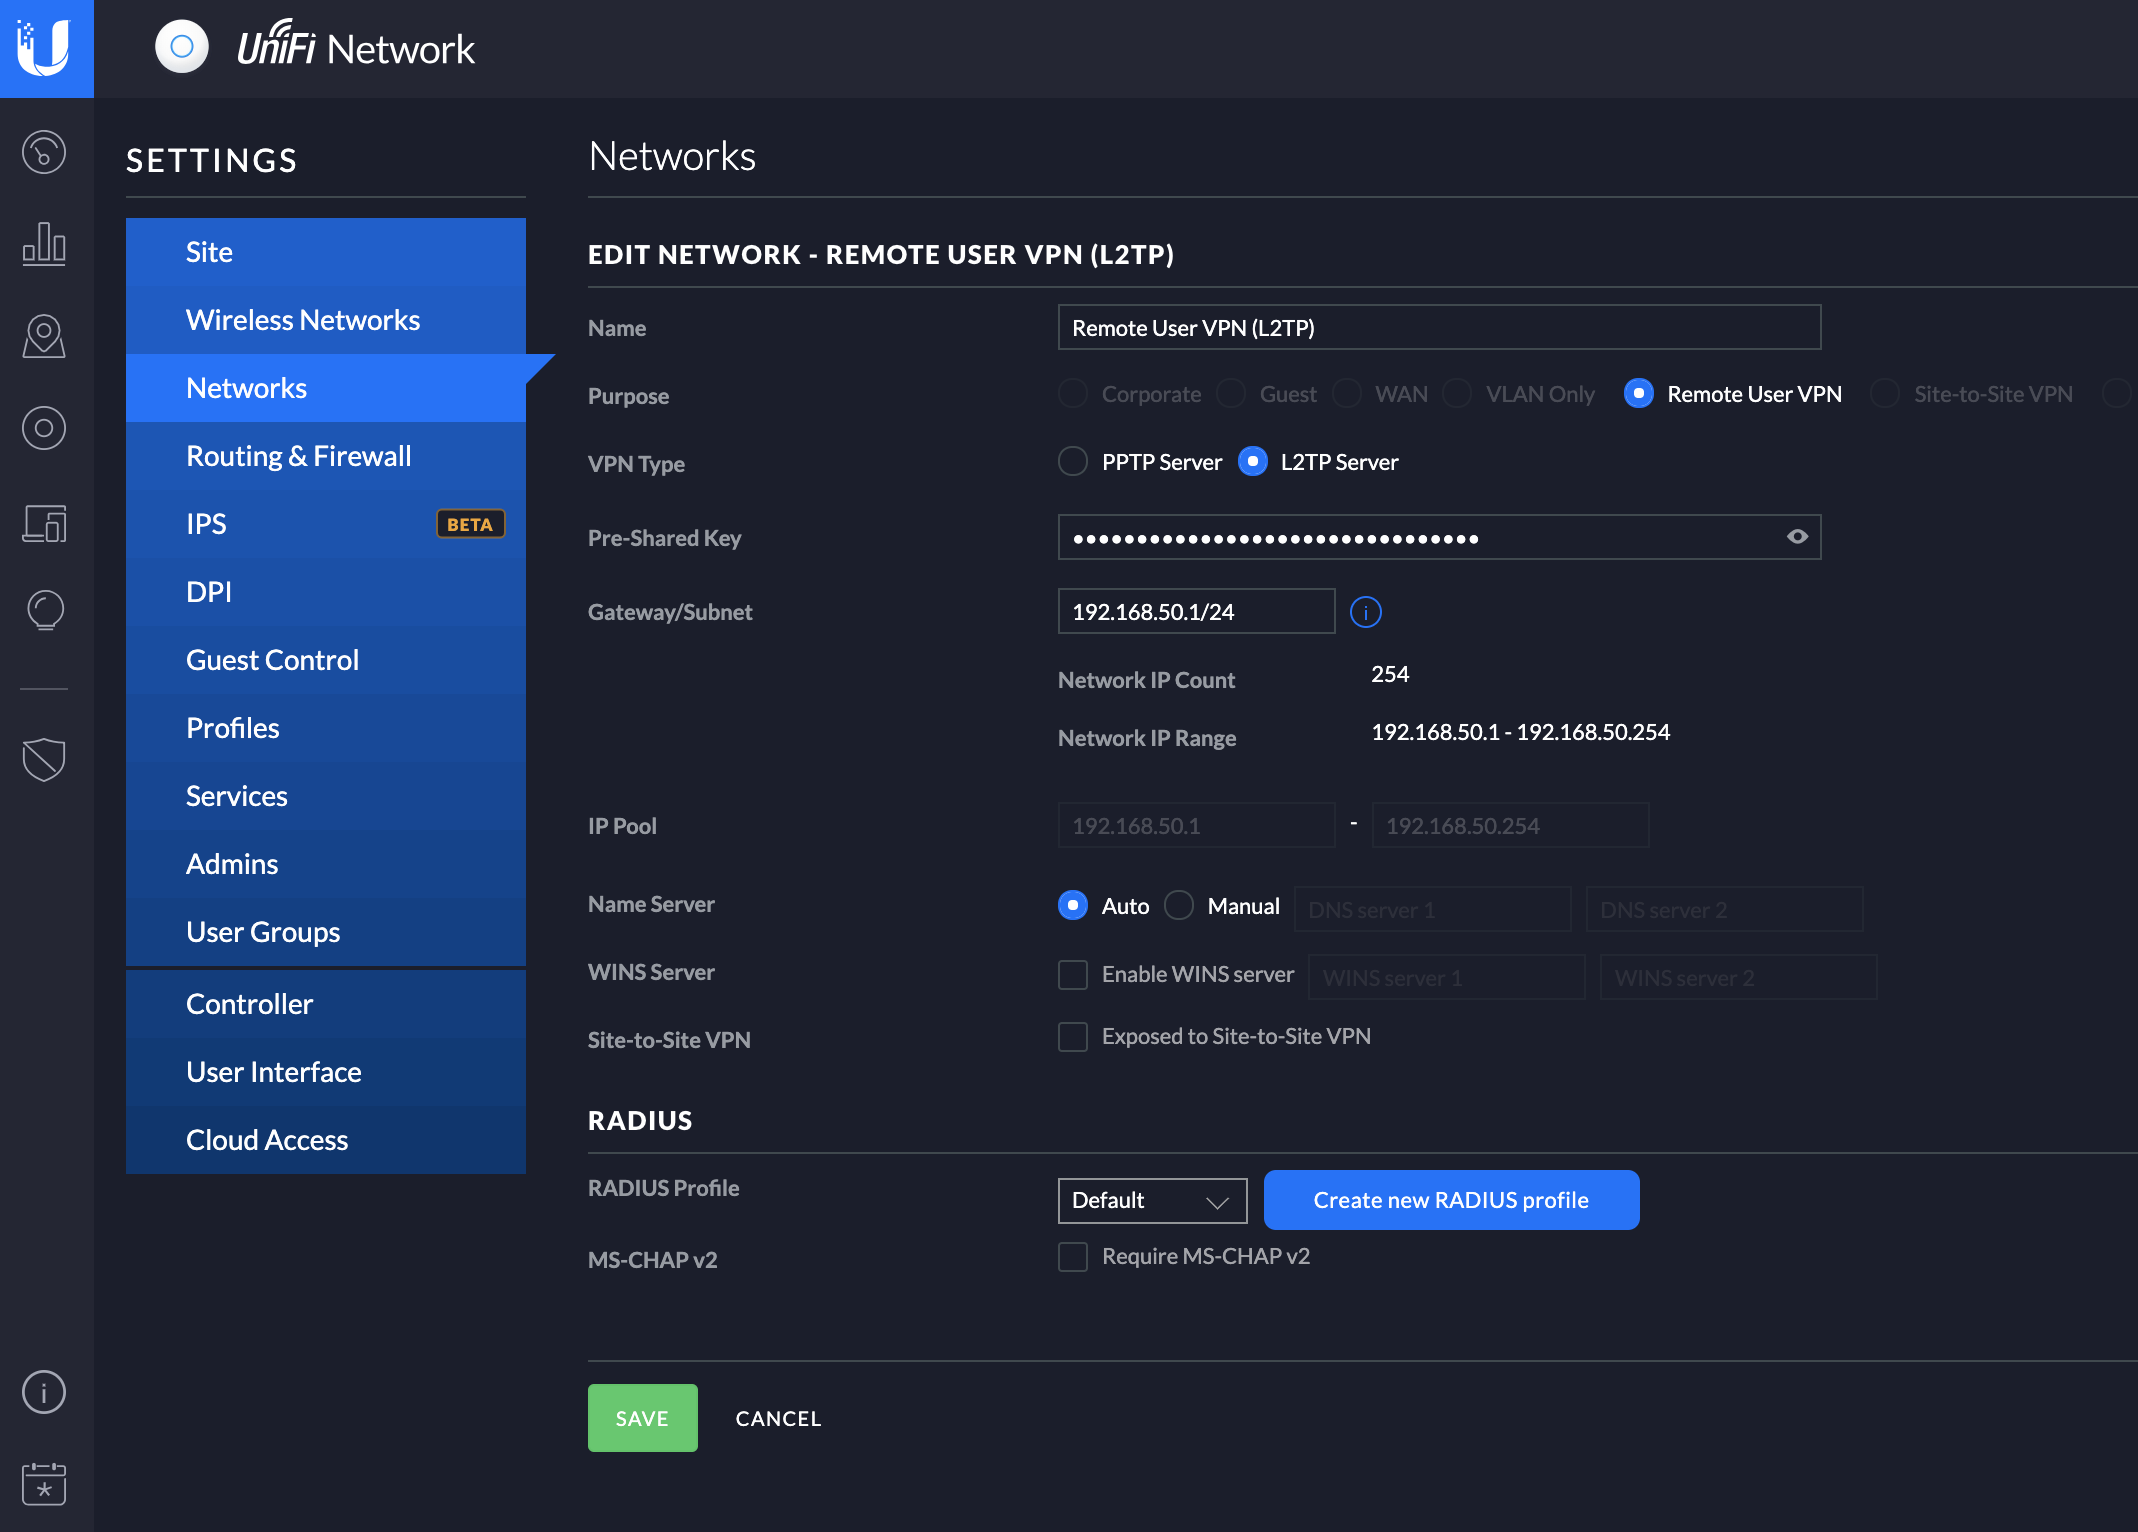
Use your own values for all of this, the most important thing is to select Remote User VPN as the Network purpose, chose L2TP Server as the VPN type and and define a proper Pre-Shared Key. The Pre-Shared Key is needed by clients in addition to the username and password defined in step 1.1 above.
I decided to call it Remote User VPN (L2TP), to make it easy to identify. For good measure I defined an entire Class C subnet for my VPN users, because you know, there will definitely be 254 simultaneous connections to my home network at any given time…
The important thing to note is that when you define a network for Remote Users, it needs to be a different network than your default network. The IP addresses cannot overlap or otherwise conflict with any other defined networks on the controller. This is simply a dedicated network, that by default has full connectivity to the other networks defined on the controller. If you want to limit it somehow, you need to put in place firewall rules that limits its access to the other network(s).
Once a client connects, it gets assigned an IP-address from the assigned pool automatically, there is no need to configure any further DHCP services or similar in that network.
You may need to manually specify your DNS servers here, try with automatic but if you can not connect via FQDN after a successful VPN connection, odds are that you will need to manually specify your internal DNS servers here as well.
Configuring your L2TP VPN Client#
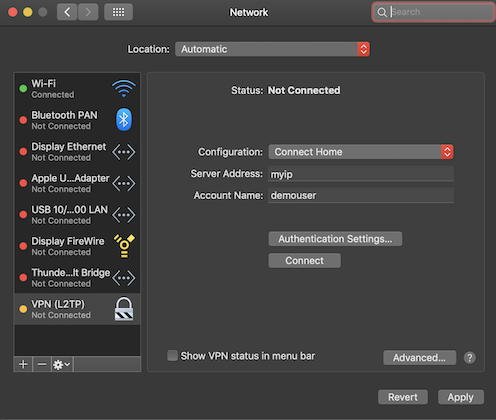
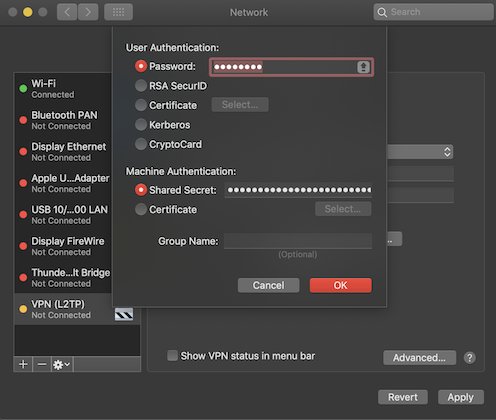
And that’s it, you should now be able to connect using a standard L2TP client, using the external IP of your controller (I use a dynamic DNS service for this), your defined username/password and the Pre-Shared Key from the network definition as the Machine Authentication Shared Secret.
This is what it looks like using the native OS X Client:
Update 06. august 2019#
Thanks to Michael White (notesfrommwhite.net) for asking a few questions that made me update this post with a few more details on the macOS client setup (and the potential DNS issue mentioned above)
I seem to have forgotten to mention a minor detail in my original post. In order to make your Mac (and possibly also Windows) able to connect to your internal resources via the DNS server specified above or via IP, you need to do one last thing.
Since L2TP connections do not publish routes, the VPN traffic does not really know where to go — which is kind of bad.
On macOS this is sorted by either sending all traffic though the VPN connection or re-arranging your network service order.
You can also add static routes, but that is a bit more complex, and requires manual updates if you change something, and might cause other problems if you connected to a network that has the same private IP range as your defined VPN network — so I’ll leave that out for now. For more details on macOS and static routes, see Persistent Static Routes in macOS
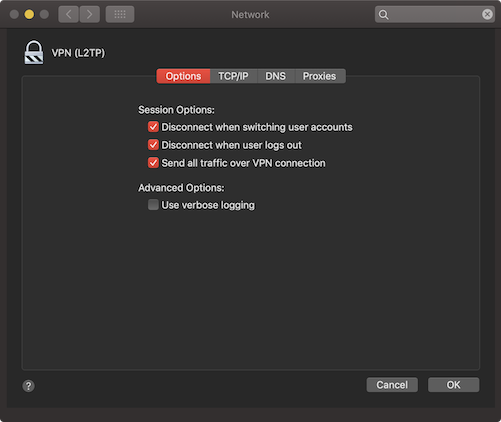
Send all traffic over the VPN#
You can force all your networking traffic to go over the VPN connection, by enabling Send all traffic over VPN connection* under Advanced… in the macOS network configuration:
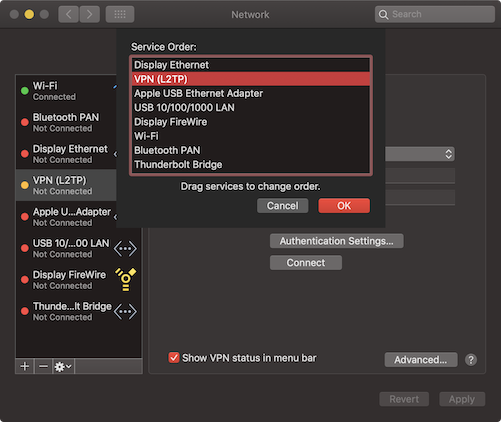
Changing the macOS Service Order#
This was a new one for me, but changing the service order of your network connections in macOS so that the VPN connection comes first (highest priority) makes split-tunneling work too! This way you can access resources in both the local network you are in, as well as resources in your remote VPN network. Best of both worlds! This is done by going to System Preferences -> Network in macOS and then clicking on the little cog icon
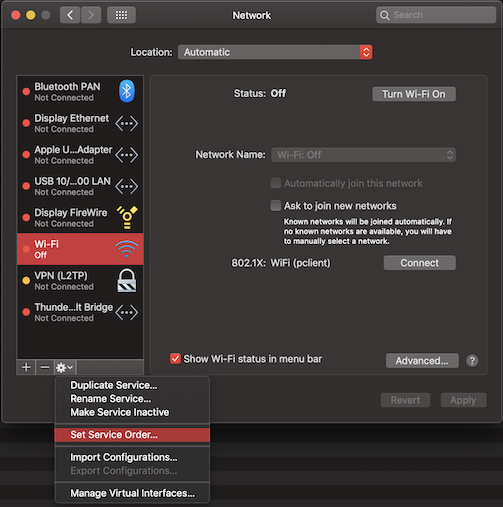
Then simply drag your VPN connection to the top of the list (or as near the top as it will let you). That takes care of the priority, and makes sure the network traffic to your VPN network is routed before the default network route for your network interface.
You should now be able to reach your internal resources, as well as “external” ones.